Modelling Tips
Card Kit Building | Card Kit Bus Garages | Converting Die-casts | Diorama Building | Diorama Bus Depot | Modelling Tools | Removing Decals | Detailing | Dismantling the OOC Optare Solo | Motorising the EFE Horsfield Tram | Painting | Providing photos for model manufacturers | Reigate Bus Garage Diorama |Waterslide Transfers (application) | Waterslide Transfers (making) | Weathering Model Buses
A series of hints and tips for the modeller - see NEW for the latest tips. Click on the pics for larger images.
Card Kit Building - Siggy de Reuther
Before
you start
 Before
starting to build any card models, the first item to address is a work
area and basic tools. If nothing else, a small off-cut of MDF slightly
larger than the cutting mat will suffice and this will mean the
"work-station" can be transported easily if you have nothing else to
work on other than the kitchen table. However, a dedicated hobby room
with work area is better if you have one.
Before
starting to build any card models, the first item to address is a work
area and basic tools. If nothing else, a small off-cut of MDF slightly
larger than the cutting mat will suffice and this will mean the
"work-station" can be transported easily if you have nothing else to
work on other than the kitchen table. However, a dedicated hobby room
with work area is better if you have one.
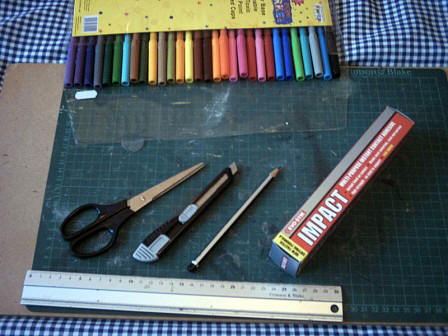
Essential items are a cutting mat, sharp knife, steel rule and glue (see
picture 1). All these items are easily obtainable in shops, often the
cutting mat will come as a starter kit with rule and knife. I always use
the Evo-Stik impact glue as I find this works very well and is an easy
product to obtain and use. Added to the basic tools such items as
scissors, tweezers, cocktail sticks, a cheap set of water-based felt tip
pens or water colour paints are advisable. The scissors are better for
cutting out the glazing from the clear sheets, tweezers are useful for
small parts, whilst cocktail sticks will help with the initial roll when
forming the card chimney pots on most models.
Getting started
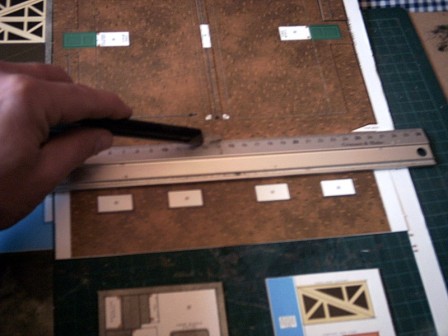
 Having
now bought a card kit or two, it is now time to commence construction.
There are a few "golden rules" to follow, and most kits will state
similar words in the instructions (see picture 2). ALWAYS read and
familiarise yourself with the instructions, making a note of the parts.
Layout all the complete sheets from the kit but NEVER remove any part
until you need it. Most card kits are pre-cut but when removing parts
NEVER feel tempted to push out the parts out as nicked or pipped edges
will occur. This can make for poor joins between parts and spoil the
end result. Therefore it is essential to cut through the card edges to
remove parts as shown (see picture 3). Taking each part as required and
colour in the white edges in as close a colour-match as possible.
(Card-4) This will greatly enhance the look of the completed kit, and
may be achieved by use of felt-tip pens or water colour paints. I would
advise working from the non-printed side to avoid any over-run onto the
visible side.
Having
now bought a card kit or two, it is now time to commence construction.
There are a few "golden rules" to follow, and most kits will state
similar words in the instructions (see picture 2). ALWAYS read and
familiarise yourself with the instructions, making a note of the parts.
Layout all the complete sheets from the kit but NEVER remove any part
until you need it. Most card kits are pre-cut but when removing parts
NEVER feel tempted to push out the parts out as nicked or pipped edges
will occur. This can make for poor joins between parts and spoil the
end result. Therefore it is essential to cut through the card edges to
remove parts as shown (see picture 3). Taking each part as required and
colour in the white edges in as close a colour-match as possible.
(Card-4) This will greatly enhance the look of the completed kit, and
may be achieved by use of felt-tip pens or water colour paints. I would
advise working from the non-printed side to avoid any over-run onto the
visible side.
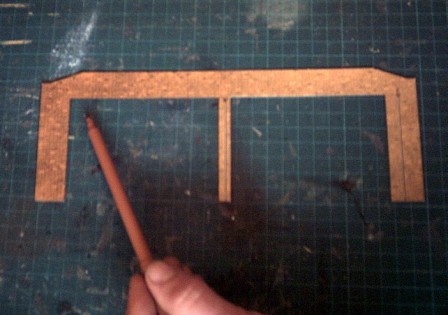 Cutting
out
Cutting
out
A golden rule with using a knife or scalpel is always use light cuts
rather than heavy pressure in case the blade breaks!
Window apertures - most kits contain wall (and sometimes roof)
sections that include cut-outs for glazing. Always remove these with a
knife, working from the corners to the centre, never work to the corners
in case of accidental slippage of the knife onto the printed surface.
Don’t forget to colour the card edges in appropriate colours, sills are
often in a contrasting colour to brickwork.
Tip: do not discard the cut-out parts from windows apertures as these
can prove useful for additional internal bracing and the perfect 90
angle is often useful for corner joints.
Construction
 When joining two kit parts (such as two walls to form a corner) there is
a technique to achieve a good result. I always use Evo-Stik Impact
because I find it an easy product to work with and the bonding qualities
are very good. Apply a thin bead to each corner edge, noting first which
part will be on the outside. Always holding the tube at a horizontal or
upward angle, very gently squeeze the far end of the tube to apply the
glue. Never hold the tube downwards otherwise gravity will take over!
Allow the glue to become touch-dry and, working on a flat surface, bring
the parts into contact and the glue will bond. There is a short time
before the glue fully sets so use this time to ensure there is no
misalignment and that the joins are squared. If the parts are not
aligned, simply pull apart immediately and re-try. If necessary,
practice gluing and joining on scrap card prior to construction.
When joining two kit parts (such as two walls to form a corner) there is
a technique to achieve a good result. I always use Evo-Stik Impact
because I find it an easy product to work with and the bonding qualities
are very good. Apply a thin bead to each corner edge, noting first which
part will be on the outside. Always holding the tube at a horizontal or
upward angle, very gently squeeze the far end of the tube to apply the
glue. Never hold the tube downwards otherwise gravity will take over!
Allow the glue to become touch-dry and, working on a flat surface, bring
the parts into contact and the glue will bond. There is a short time
before the glue fully sets so use this time to ensure there is no
misalignment and that the joins are squared. If the parts are not
aligned, simply pull apart immediately and re-try. If necessary,
practice gluing and joining on scrap card prior to construction.
Glazing
Glazing normally comes in printed sheets and requires cutting out.
Always hold the glazing pieces by the edges otherwise unsightly finger
prints will transfer onto the glazing! To fix the glazing in place,
apply glue to inner sides of the wall sections, working around the edges
but do not pass the tube over the opening in case of glue "stringing".
If this does occur, remove with a cocktail stick prior to fitting
glazing. I find the best method to fix glazing in place is to lay the
glazing down on the work surface, making sure the printed side is
face-up, as per instructions, and carefully lower the wall section down
onto the glazing. Ensure the glue is touch-dry before commencing this
procedure and the glazing is nicely centred with an even frame. Once you
are happy, fully press down the wall section to bond fully. Often kits
will include extra glazing so, again, practice makes perfect!
Glazing Tip 1: One point to consider is that all manufacturers’
instructions say that the printed side of glazing should face outwards.
However if you are constructing something like a bus garage where the
back wall will be positioned against the diorama back-scene, there is
little point in doing this and visually it will be better to reverse the
glazing so the printed side is displayed.
 Glazing
Tip 2: For a touch of added realism, if you want to model
derelict buildings, try carefully cutting out some of the individual
glass panes. Smashed windows can be simulated by pressing the knife
point into individual panes and carefully "nicking out" parts of
individual panes. Even some of the older traditional bus garages often
have a broken windows. The trick is less-is-best for believable results
(see picture 5).
Glazing
Tip 2: For a touch of added realism, if you want to model
derelict buildings, try carefully cutting out some of the individual
glass panes. Smashed windows can be simulated by pressing the knife
point into individual panes and carefully "nicking out" parts of
individual panes. Even some of the older traditional bus garages often
have a broken windows. The trick is less-is-best for believable results
(see picture 5).
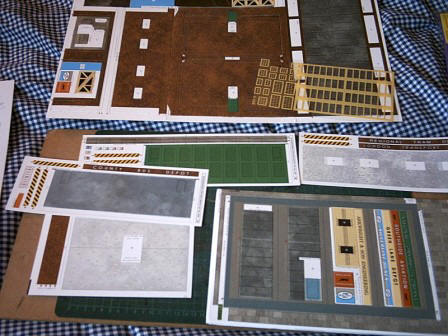
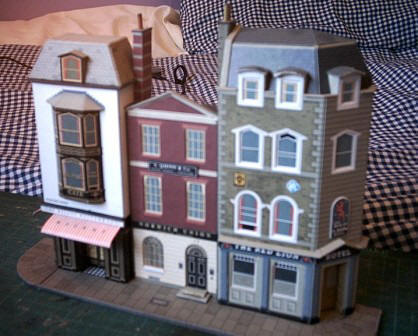
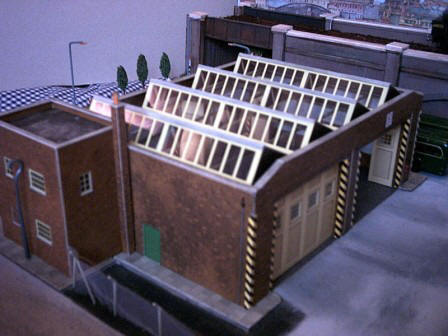
Work in small stages
It is often easier to work on one building or a row of buildings
(see pictures 6 and 7)
and then add these by "plugging in". Illustrated is one of Superquick
low-relief kits where paving has been added in readiness to add to a
future diorama project. Note the use of additional card bracing and use
of scrap card on the rear view.
Sourcing Materials
Those that have seen and read about my Devils Dyke diorama will know
that the actual base started life as a pizza box! Even the road surfaces
are textured using dried out tea and talc, whilst the tree trunk is
twisted wire strands covered in bandage! With a little imagination, it
is amazing what non-model products can be added to the overall diorama
display!
![]()
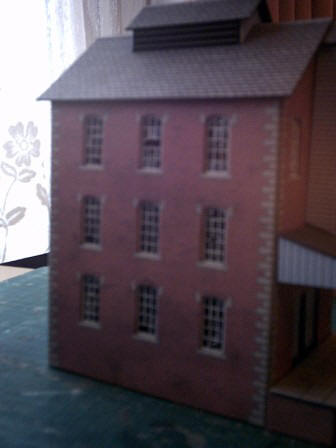
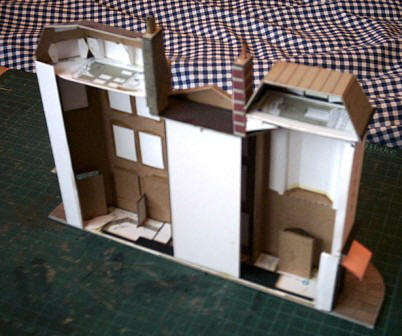
Card Kit Bus Garages - Siggy de Reuther
 Building
a card bus garage - Metcalfe vs. Superquick
Building
a card bus garage - Metcalfe vs. Superquick
Both the leading card kit manufacturers, Metcalfe and Superquick,
produce kits of bus garages. It is all down to personal choice as to
which one you purchase but to help you choose the right one for your
project, I would like to offer some thoughts.
Both kits are fairly evenly priced at around £9.00 each, are readily
available from most model railway shops and both feature a number of
alternative features that the modeller can use.
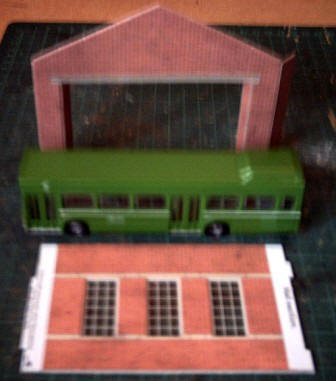
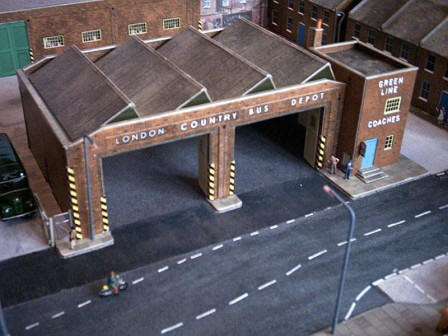
Superquick Bus Depot - Kit B34
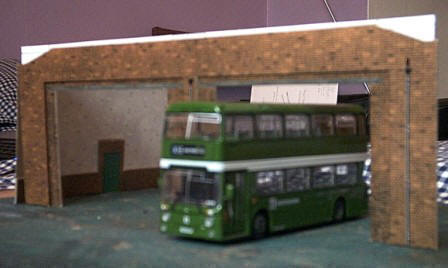 The Superquick bus depot kit is a brown-brick rectangular shaped
building with an office building and paving surround. The building is a
little reminiscent of London Transport, approx 1920s pre-art deco style.
There is a choice of wooden-style garage doors, either cream or green
that can be used in fully closed, partially open or fully open positions
- there is also a shutter door lining. The garage opening is only on one end unless a second kit is
added. The roof is the "northern light" style with roof windows all
facing in one direction. A limited number of internal roof supports are
included which are effectively cream lines on a black background but all
the same very effective when viewed from above through the roof glazing.
The rear wall and two end walls feature internal brick lining in
contrasting light grey, the rear wall features four small windows. An
option is the roof mounted tram-baffles, there are optional yellow/black
chevrons for entrance wall corners, and other signs. Most unusual is the
office tower walls that can be overlaid to represent either a water or
fuel tank. Guttering is pre-printed to the outer depot walls. Finally a
choice of signs can be added to the frontage.
The Superquick bus depot kit is a brown-brick rectangular shaped
building with an office building and paving surround. The building is a
little reminiscent of London Transport, approx 1920s pre-art deco style.
There is a choice of wooden-style garage doors, either cream or green
that can be used in fully closed, partially open or fully open positions
- there is also a shutter door lining. The garage opening is only on one end unless a second kit is
added. The roof is the "northern light" style with roof windows all
facing in one direction. A limited number of internal roof supports are
included which are effectively cream lines on a black background but all
the same very effective when viewed from above through the roof glazing.
The rear wall and two end walls feature internal brick lining in
contrasting light grey, the rear wall features four small windows. An
option is the roof mounted tram-baffles, there are optional yellow/black
chevrons for entrance wall corners, and other signs. Most unusual is the
office tower walls that can be overlaid to represent either a water or
fuel tank. Guttering is pre-printed to the outer depot walls. Finally a
choice of signs can be added to the frontage.
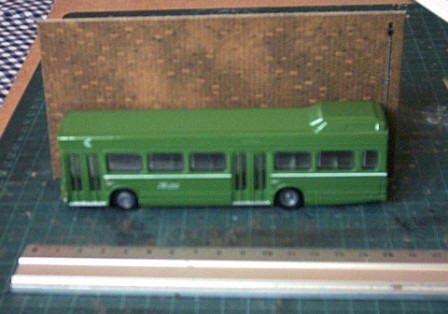
The footprint of the depot is 165mm x 250mm, with office this increases
to 305mm, excluding surrounding paving. Effectively, four buses can be
accommodated up to a scale 37ft length. The photo shows an 11m Leyland
National as a guide. The ground to front wall clearance is 70mm allowing
full-height double deckers have sufficient clearance. The doors on the
two end walls are green whilst the office door is blue.
Metcalfe OO Bus Garage - Kit PO225
 The
Metcalfe bus garage is also a traditional-style building in red brick
with cream and grey interior colour. The design is more versatile than
Superquick in that wall sections consist of two parts so that either a
wall or entrance way can be constructed allowing various shapes. Each
section is 132mm long and builds into a square shape. The wall sections
are effectively double thickness card with glazing sandwiched between.
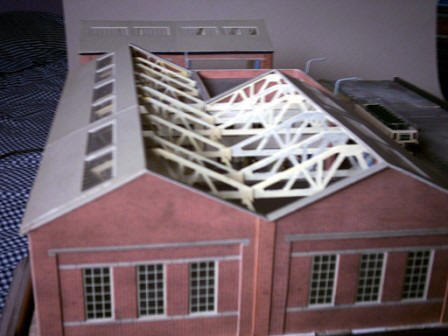
Apexed roofs have windows on both angles. The office section can be
fitted within the outer wall sections as either an end-on or side-on
structure. The kit comprises three complete sections and can accommodate
six vehicles. Whereas the Superquick kit can accommodate a 37 foot
vehicle the Metcalfe wall sections will only allow for a scale 31ft
length bus. The ground to entrance height clearance is 65mm but still
sufficient for a full-height double decker. Built as shown in the
picture on the packaging, the footprint is 132mm x 396mm, with office
built on the end increasing to 448mm. Concertina type doors are provided
finished in two-tone blue that can only be built in the open position or
paper roller shutters for the sections with two narrower entrances. The
office is also finished with blue doors for personnel. Grey card roof
trusses are also included. There is no paving or guttering included but
a range of optional regional "mix and match" signs.
The
Metcalfe bus garage is also a traditional-style building in red brick
with cream and grey interior colour. The design is more versatile than
Superquick in that wall sections consist of two parts so that either a
wall or entrance way can be constructed allowing various shapes. Each
section is 132mm long and builds into a square shape. The wall sections
are effectively double thickness card with glazing sandwiched between.
Apexed roofs have windows on both angles. The office section can be
fitted within the outer wall sections as either an end-on or side-on
structure. The kit comprises three complete sections and can accommodate
six vehicles. Whereas the Superquick kit can accommodate a 37 foot
vehicle the Metcalfe wall sections will only allow for a scale 31ft
length bus. The ground to entrance height clearance is 65mm but still
sufficient for a full-height double decker. Built as shown in the
picture on the packaging, the footprint is 132mm x 396mm, with office
built on the end increasing to 448mm. Concertina type doors are provided
finished in two-tone blue that can only be built in the open position or
paper roller shutters for the sections with two narrower entrances. The
office is also finished with blue doors for personnel. Grey card roof
trusses are also included. There is no paving or guttering included but
a range of optional regional "mix and match" signs.
There is little to choose between the two kits, both look effective and
will look good as bus garages. Careful consideration with regard to
measurements should be noted, especially if you wish to house 18 metre
bendibuses or 12 metre coaches. Care must also be taken with regard to
entrance height if you wish to display trams but trolleybus booms should
have sufficient clearance. In both kits, there is added benefit in
joining more than one kit although care should be taken with regard to
accessibility of model buses by human hands. In particular the
Superquick kit would need the roof adapted to be lifted if more than two
kits are to be joined. Possibly the Metcalfe kit could be built with the
apexed roof sections left removable for ease of access. Each kit has its
own plus and minus points, certainly the Metcalfe kit adds greater
freedom and versatility for entrance positions but the Superquick model
offers better looking doors with options in open or closed positions. In
reality a bus garage structure would have far more roof trusses than
either kit supplies and further interior detail could be added by the
modeller, especially to the inner roof but it will largely depend on
personal preferences. Consider also how much of the interior will be
effectively viewed! On the Metcalfe kit, the office interior would need
some interior detail as this can be clearly seen through the glazing.
Curiously, both kits provide blue colour office doors. In reality,
especially with more traditional major bus operators, doors usually
tended to compliment the fleet colours of the company so I would
recommend sourcing alternatives (such as the Peco LK78 builder pack
which includes plastic doors and gutters that can be painted into your
chosen colours).
Further modelling tips
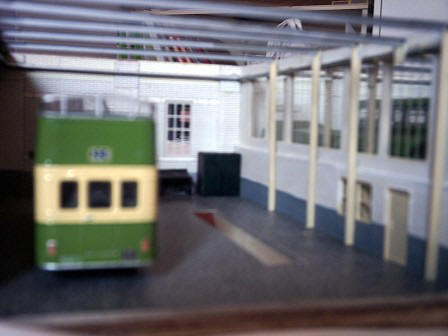
Adding a maintenance or inspection pit can be achieved by using the Peco
LK56 loco kit. Simply file or cut off the rail chairs and insert into a
cut-out in the baseboard.
Weathering and super-detailing. All card models can be further enhanced
by lightly weathering the walls. This can be achieved in a number of
ways. A range of weathering powders can be applied to walls, or by a
technique called dry-brushing. Simply load paint onto the brush and wipe
most this off onto a cloth. Then run the brush down the walls of your
building but be careful not to add too much. It cannot be stressed
enough that you should research prototypes and refer to photographs
before attempting such replication in model form.
 Consider
also, if you are modelling modern buildings, that attention should be
paid to various health and safety notices that are displayed and these
can be replicated from photographs using a colour scanner/copier for use
on models. In 1/76 scale, it is possible to re-create signs sufficiently
without worrying about too much detail such as "hi-visibility clothing
must be worn" signs where the symbol is instantly recognisable even if
the associated wording cannot be read by the human eye! Other points to
consider is the oil deposits that buses can leave, exhaust blackening of
interior depot walls, guttering and down pipes. Should you wish to fully
replicate internal steel roof supports, girders can be easily made using
OO-scale rails. The photo (Edward
Street workshops) illustrates this, together with the Peco LK56
inspection pit and other items built from the Peco builder pack.
Consider
also, if you are modelling modern buildings, that attention should be
paid to various health and safety notices that are displayed and these
can be replicated from photographs using a colour scanner/copier for use
on models. In 1/76 scale, it is possible to re-create signs sufficiently
without worrying about too much detail such as "hi-visibility clothing
must be worn" signs where the symbol is instantly recognisable even if
the associated wording cannot be read by the human eye! Other points to
consider is the oil deposits that buses can leave, exhaust blackening of
interior depot walls, guttering and down pipes. Should you wish to fully
replicate internal steel roof supports, girders can be easily made using
OO-scale rails. The photo (Edward
Street workshops) illustrates this, together with the Peco LK56
inspection pit and other items built from the Peco builder pack.
The Spares Box
If you are planning to build a diorama, never throw any unused card-kit
parts away. You never know when these will come in handy. For example,
again, referring to the Edward Street workshops photo, take a close look
at the partition wall. Whilst the wall is actually built from scrap
card, the windows are made from left over roof window glazing from one
of the Metcalfe kits!
![]()
Converting Die-casts -
Rod Blackburn
 London
Transport
STD
Class. A conversion of EFE 15901 made about three years ahead of EFE's
own conversion. Some of the changes would still be relevant today. In
particular, repositioning the nearside headlight and fog light; adding
an offside sidelight and cutting a nearside footstep below the first
passenger window. The radiator on 15901 is the earlier EFE PD radiator
and in my opinion is superior to the later version, but it does benefit
from being raised by about 0.5mm as here. Driver's mirrors were added. I
chose to represent the destination indicator in recessed form by
drilling and filing a brass sheet insert for a hole cut and filed in the
body. Plastic card could be used instead, but filed brass is potentially
more accurate. The rear number plate was also recessed and rear lights
drilled in the body. The roof box was made of plastic card and let into
a cut and filed slot in the roof. Of course, EFE's own STD would not
need this work. If you think you can manage it, the raised moulding
below the lower deck windows should be filed down. I didn't have the
courage.
London
Transport
STD
Class. A conversion of EFE 15901 made about three years ahead of EFE's
own conversion. Some of the changes would still be relevant today. In
particular, repositioning the nearside headlight and fog light; adding
an offside sidelight and cutting a nearside footstep below the first
passenger window. The radiator on 15901 is the earlier EFE PD radiator
and in my opinion is superior to the later version, but it does benefit
from being raised by about 0.5mm as here. Driver's mirrors were added. I
chose to represent the destination indicator in recessed form by
drilling and filing a brass sheet insert for a hole cut and filed in the
body. Plastic card could be used instead, but filed brass is potentially
more accurate. The rear number plate was also recessed and rear lights
drilled in the body. The roof box was made of plastic card and let into
a cut and filed slot in the roof. Of course, EFE's own STD would not
need this work. If you think you can manage it, the raised moulding
below the lower deck windows should be filed down. I didn't have the
courage.
 London
Transport RT Class, 'pre-War' variety. A conversion of EFE 10101S made
soon after introduction of the model. The most obvious differences
between the 'pre-War' RTs and 10101S are the roof boxes and the drooping
window lines of the driver's cab. The roofboxes were made in a similar
way to the
STD.
The driver's windows were simply filed out, but the body mouldings
needed to be restored. In this case suitable fuse wire was bent and
glued on with cyanoacrylate (super-glue). Similarly, five vents were
made up from fuse wire and glued to the front of the cab. The offside
headlight was removed and its locating hole filled with plastic card.
Another characteristic of the 'pre-War' RTs was the tumblehome on the
offside rear. This was created by cutting a slot just ahead of the
curved corner of the body, gently bending the lower edge of the body
inwards and then filing the corner to match. The slot was then filled
with putty. The front dome is a weakness of the EFE RT casting. In this
case the outer window pillars were cut at the top and bent slightly
inwards. The roof was then filed to improve its shape, the body
mouldings were once again replaced with fuse wire and the pillar gaps
filled. Finally, driver's mirrors were added.
London
Transport RT Class, 'pre-War' variety. A conversion of EFE 10101S made
soon after introduction of the model. The most obvious differences
between the 'pre-War' RTs and 10101S are the roof boxes and the drooping
window lines of the driver's cab. The roofboxes were made in a similar
way to the
STD.
The driver's windows were simply filed out, but the body mouldings
needed to be restored. In this case suitable fuse wire was bent and
glued on with cyanoacrylate (super-glue). Similarly, five vents were
made up from fuse wire and glued to the front of the cab. The offside
headlight was removed and its locating hole filled with plastic card.
Another characteristic of the 'pre-War' RTs was the tumblehome on the
offside rear. This was created by cutting a slot just ahead of the
curved corner of the body, gently bending the lower edge of the body
inwards and then filing the corner to match. The slot was then filled
with putty. The front dome is a weakness of the EFE RT casting. In this
case the outer window pillars were cut at the top and bent slightly
inwards. The roof was then filed to improve its shape, the body
mouldings were once again replaced with fuse wire and the pillar gaps
filled. Finally, driver's mirrors were added.
![]()
Dioramas: Building a 3-dimensional display for your
models - Siggy de Reuther
What is a diorama?
Dioramas are a way to display your model buses in a scenic setting
that can depict a natural setting in miniature. The display can be
any size chosen by the builder, and is limited by the space
available rather than a limit to imagination or creativity. Often it
is also the art of illusion, suggesting a small area of something or
somewhere much bigger.
What to build
 Before deciding what you want to build, it is often worth
carefully considering where you are going to display your diorama
and whether you want it to be portable. It could be built into a
bookshelf, as a centre-piece to a room or, indeed, fill a spare
room. What is important is to choose something that your wife,
partner or fellow inhabitants will not object to! If you have the
luxury of an entire spare room, there is yet another consideration -
that is the size! It is no good building something that is 7ft x 7ft
only to find that you cannot reach any part of the diorama with your
hands. For example you may want to change the model buses you are
displaying so location and size are the watchwords!
Before deciding what you want to build, it is often worth
carefully considering where you are going to display your diorama
and whether you want it to be portable. It could be built into a
bookshelf, as a centre-piece to a room or, indeed, fill a spare
room. What is important is to choose something that your wife,
partner or fellow inhabitants will not object to! If you have the
luxury of an entire spare room, there is yet another consideration -
that is the size! It is no good building something that is 7ft x 7ft
only to find that you cannot reach any part of the diorama with your
hands. For example you may want to change the model buses you are
displaying so location and size are the watchwords!
A Firm Foundation
 Once you have decided on how big the diorama will be, the next
step is decide what material to use. This can be anything from a
large pizza-box, suitably reinforced with scrap card, to a
purpose-built board or even a paste table. The important point to
remember here is that the base of your diorama should be level
unless you can devise a means to secure your model buses. Such a
foundation should be rigid, but consider if you want it to be
portable: think about the practicalities of moving it through
doorways, the ease of loading into a car and the weight of the
finished product.
Once you have decided on how big the diorama will be, the next
step is decide what material to use. This can be anything from a
large pizza-box, suitably reinforced with scrap card, to a
purpose-built board or even a paste table. The important point to
remember here is that the base of your diorama should be level
unless you can devise a means to secure your model buses. Such a
foundation should be rigid, but consider if you want it to be
portable: think about the practicalities of moving it through
doorways, the ease of loading into a car and the weight of the
finished product.
The next step is to decide what you wish to portray. This could be a
bus depot, bus station, urban road scene, countryside, etc, and the
era you wish to portray. This can range from a prototypical setting,
an impression of a particular location, or be pure fiction. The
choice is yours. I would recommend a plausible setting to avoid
saturation with too many model buses! This may involve some research
through photographs and books, dependent on what you are building.
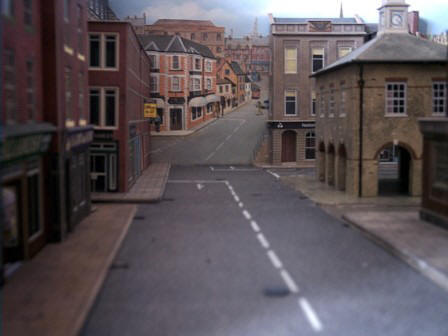
 The
London Road
- a diorama in the making
The
London Road
- a diorama in the making
For the purpose of illustrating the creation and building of a
diorama, I have included a number of progress-photographs. As a
working title I have called this
London Road.
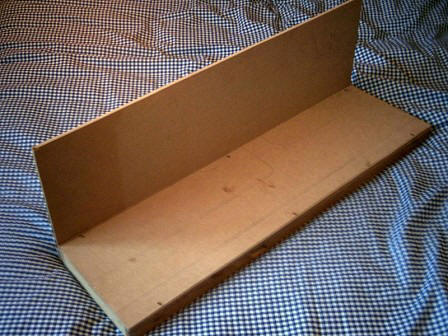
The base is a simple rectangular structure built from 2"x1" timber,
the "ground" area approximately 74cm long x 21cm deep (see picture 1). To create the
surface 6mm thick MDF board is added whilst a solid back from MDF
(for the back-scene) has a visible 21cm in height. It is important
to ensure that the maximum height is suitably higher than the
tallest structure to be added later. Sufficient height must be
accommodated for vulnerable items such as chimneys on any buildings
to be built. The wood frame and MDF has been screwed and glued with
a proprietary wood glue.
Once the board has been built, it is time to decide on what to add
to the back-scene
(see picture 2).
If you are fairly artistic then a watercolour painting could be
used. If not, there are a range of printed back-scenes that can be
purchased that range from artwork to photo-real, price-wise from £1
to £15. The photo shows just a fraction of the many available
back-scene buildings that are available. Always work from the
far-distance, firstly adding or painting the sky, followed by the
more distant scenery. Remember that far-distant features are more
subtle and faded, the nearer foreground will have stronger, more
detailed colours and features to create the illusion of depth.
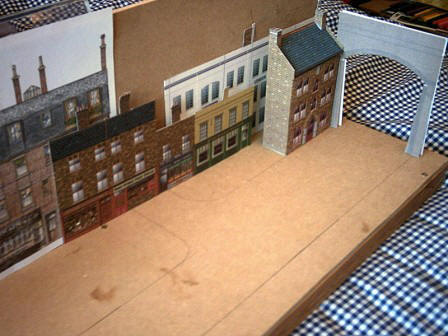
 Next
is to try out various buildings/structures until you reach something
you are happy with
(see pictures 3 and 4).
It is worth adding a few buses and working out the road widths. On
the photos you will see a few pencil lines as a guide to pavements
on London Road.
Next
is to try out various buildings/structures until you reach something
you are happy with
(see pictures 3 and 4).
It is worth adding a few buses and working out the road widths. On
the photos you will see a few pencil lines as a guide to pavements
on London Road.
Further reading and research: It is worth obtaining a copy of a
model railway magazine such as Hornby Magazine, Railway Modeller,
etc, as much if not most of the diorama ideas are common to the
model railway hobby. There are many advertisers of suitable scale
street-furniture, trees, buildings, etc, contained in such
magazines. You may well find some of the Accessories links available
on this web site helpful Additionally a visit to a local model
railway stockist will provide a wealth of materials suitable for the
needs of the diorama builder, especially in 4mm or 1/76 scale.
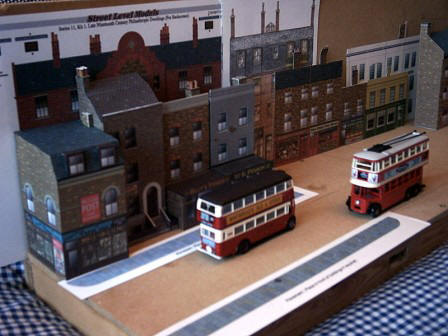
Mixing and matching
Using readily obtainable products from a well-stocked model railway
shop should provide you with sufficient card kits, printed
back-scenes and other items of street furniture to make a realistic
setting.
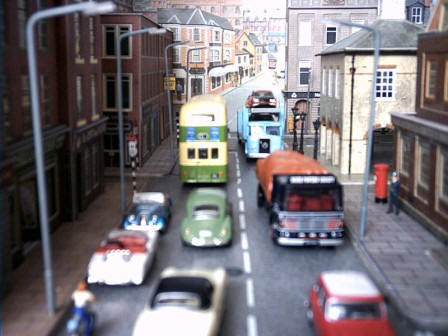
In Picture 5, the background scene is not simply one but several
back-scenes overlaid to create my desired perspective of distance. A
sky sheet with clouds comes from the
Peco range as do the nearer
buildings on the back-scene. Between these are parts from the
Townscene range. Similarly, the card kits are a mixture of
Superquick and
Metcalfe, some of which have been further modified or
enhanced with the addition of plastic guttering and downpipes. The
road surface is Metcalfe tarmac sheets, to which Langney models
brass-etch drains and manhole covers have been added as well as
white road lines by
Busch.
 Picture
6 shows more life with the addition of vehicles, street lights,
traffic lights, and road signs. Again a mix of manufacturers’
products can be seen. Research is the key so as not to add vehicles
or road signs from differing eras.
Picture
6 shows more life with the addition of vehicles, street lights,
traffic lights, and road signs. Again a mix of manufacturers’
products can be seen. Research is the key so as not to add vehicles
or road signs from differing eras.
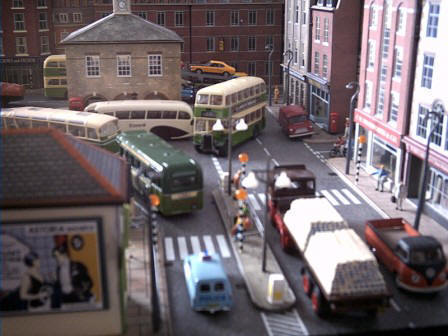
Picture 7 adds items such as a telephone box, post box, zebra
crossing beacons and most importantly, people! Unlike the vehicles
and buildings, the people are not in fact 1/76 scale but of European
origin in 1/87 scale but the range is vastly superior to what is on
offer in 1/76 and (in my opinion) does not look too small against
the vehicles.
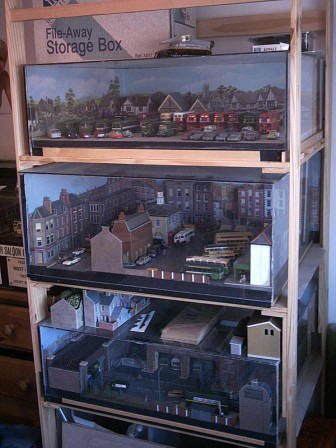
Storage solution
I have been asked several times how big some of the dioramas
actually are. Hopefully the art of illusion has been successful but
Picture 8 gives the game away! Taking up only one floor area, I
actually have three different dioramas on display in various stages
of completion, each measuring only 3ft x 2ft.
The frame is simply two slated pine bookshelf units, available from
most DIY stores in flat packs. These were modified to add greater
depth and joined to give the necessary height to accommodate three
dioramas. Each diorama can be exchanged between shelves.
The Perspex dust covers will be described later.
![]()
Dioramas: Planning a
Bus Depot Diorama - Siggy de Reuther
 Fig.
1 is based on the traditional bus depot that would have been built
for a large operator or municipal. Often the building would have
been a brick-built structure built during the Victorian age,
sometimes originally as a tram depot. Often the design of the
building would have included large arched windows and a symmetrical
design. Possibly a town crest would have been included. The plan
shows a single entrance and exit separated by a pillar. The office
block (OB)
is built as an internal structure and very much as part of the
building. Perhaps the outside wall would have included a grand
public entrance. Parking would have been in regimental lines and
often there can been seen a logical layout to the refuelling as
buses returned to the depot at night. The fuel pump (marked FP) has
been positioned centrally to enable such to take place. The fuel
tank (FT) would have fed the pump via overhead pipes built into the
roof framework. Often the bus washing facilities would have been a
labour-intensive affair, often done by hand and so the bus wash area
is very much an internal part of the depot. The maintenance pits
would have accounted for a large area and traditionally bus
companies did much of their own work. A paintshop and stores could
also be included. The drawing shows the depot building in its
entirety but perhaps one of the side walls could be left off for
greater display of the model buses.
Fig.
1 is based on the traditional bus depot that would have been built
for a large operator or municipal. Often the building would have
been a brick-built structure built during the Victorian age,
sometimes originally as a tram depot. Often the design of the
building would have included large arched windows and a symmetrical
design. Possibly a town crest would have been included. The plan
shows a single entrance and exit separated by a pillar. The office
block (OB)
is built as an internal structure and very much as part of the
building. Perhaps the outside wall would have included a grand
public entrance. Parking would have been in regimental lines and
often there can been seen a logical layout to the refuelling as
buses returned to the depot at night. The fuel pump (marked FP) has
been positioned centrally to enable such to take place. The fuel
tank (FT) would have fed the pump via overhead pipes built into the
roof framework. Often the bus washing facilities would have been a
labour-intensive affair, often done by hand and so the bus wash area
is very much an internal part of the depot. The maintenance pits
would have accounted for a large area and traditionally bus
companies did much of their own work. A paintshop and stores could
also be included. The drawing shows the depot building in its
entirety but perhaps one of the side walls could be left off for
greater display of the model buses.
The key to building a successful and realistic model is to
understand that most depots emerged from the days of either
horse-drawn buses or else as a tramshed and evolution is the key to
positioning the various depot features and infrastructure. In many
cases the depots would have been situated close to town centres
where space would have been a premium, especially as buses came to
be permitted to greater and greater lengths. Another point to
remember is that window frames, doors and gutters/downpipes of the
buildings often reflected the livery of the buses.
 By
contrast, Fig. 2 represents a modern day yard. Like the fashion for
open plan in houses, the same can be said of today’s bus depots.
This plan represents the new yard often built on an industrial site,
far removed from the town centres. Gone is the brick-built Victorian
building but in many ways the modern open yards and much better as a
basis for display of model buses. The boundary of the premises is no
longer a brick built affair but security or chain-link fencing with
metal gates replacing large heavy wooden garage doors. The only
building is the workshop and stores and offices, often a corrugated
steel kit-like structure with few windows, accommodating only two or
three buses for servicing rather than major overhaul as in days of
old. Like the bus parking, even the fuel tank (FT) fuel pump (FP)
and bus wash (BW) are condemned to a life in all weathers. The bus
wash is now no longer a labour intensive business but an automated
machine often set in rails and very much a "drive-through"
operation. However the biggest change has to be the inclusion of a
staff car park (SCP) reflecting the changes of our society and how
so many undertake there journeys to work. Emphasis is now on health
and safety rather than attractive building design and so an
abundance of warning signs should be included. For a really
up-to-date premises, perhaps a bus-shelter like structure could be
included in a remote corner for the smokers amongst the staff!
By
contrast, Fig. 2 represents a modern day yard. Like the fashion for
open plan in houses, the same can be said of today’s bus depots.
This plan represents the new yard often built on an industrial site,
far removed from the town centres. Gone is the brick-built Victorian
building but in many ways the modern open yards and much better as a
basis for display of model buses. The boundary of the premises is no
longer a brick built affair but security or chain-link fencing with
metal gates replacing large heavy wooden garage doors. The only
building is the workshop and stores and offices, often a corrugated
steel kit-like structure with few windows, accommodating only two or
three buses for servicing rather than major overhaul as in days of
old. Like the bus parking, even the fuel tank (FT) fuel pump (FP)
and bus wash (BW) are condemned to a life in all weathers. The bus
wash is now no longer a labour intensive business but an automated
machine often set in rails and very much a "drive-through"
operation. However the biggest change has to be the inclusion of a
staff car park (SCP) reflecting the changes of our society and how
so many undertake there journeys to work. Emphasis is now on health
and safety rather than attractive building design and so an
abundance of warning signs should be included. For a really
up-to-date premises, perhaps a bus-shelter like structure could be
included in a remote corner for the smokers amongst the staff!
Both the drawings are very, very loosely based on actual places,
namely Colchester and Dagenham and as such the drawings only show
single entrance/exits for the buses whereas often there may be
separate entrances/exits at both ends of the premises. There are no
hard and fast rules to a depot plan except in the logic of
positioning of structures but it is certainly worth researching this
through photographs or visiting real locations. Whilst the latter is
desirable especially if you intend to model an actual location,
please remember these are private property and permission must be
sought before entering such places.
![]()
Modelling tools: a beginners guide - Donald Grant
Exactly what tools are needed by modellers is dictated by the type of
modelling that is to be undertaken, so my intention here is to suggest a
group of basic requirements for those who are going to be building
layouts or dioramas as well as for those building kits and modifying
die-casts. It's really surprising what you actually have lying around
the home that can be used in modelling. There is something useful to be
found in nearly every room in the house, but the two most common places
are the kitchen and the bathroom. So here are a few of the things you'll
find around the house that will come in useful. Cotton buds, darning
needles, dressmaker's pins, cocktail sticks, cooks matches and Blu Tack.
Some essential sundry items that aren't really tools but are handy to
have are empty foil dishes from Chinese take-away meals, nail varnish
remover, Duraglit or Brasso cotton wadding and empty Ferrero Rocher
boxes (great for keeping the various parts of dissembled models from
going astray!). The foil dishes are used as containers for using
Nitromors or a similar paint stripper which must never be used in
plastic containers as it will melt them. Models to be paint-stripped are
placed in the foil "bath".
Moving on to hand tools, the list is almost endless and if you are not
careful can be expensive. My advice is to root around in ‘pound shops’
as they often have perfectly good tools selling very cheaply. I have
found in practice over the years that you lose (or loan and don't get
back!) far more tools than you ever break so keeping costs down is a
bonus. Anyway here we go with a few essentials:
a set of needle files, craft knives, jeweller’s screwdrivers, steel
rule, steel scale rule, junior hacksaw, scissors (large and small) and a
razor saw. Another handy thing to have is a dental hand-scaler, it can
be used for all sorts of things. They can be bought in major
supermarkets and usually come in a set with a dental mirror (these have
their uses too!). However if you are on good terms with your dentist you
could always ask him/her if he/she has any old hand instruments that are
surplus to requirements, again there are many uses they can be put to.
Whilst we are in the dental department in the supermarket it's an idea
to pick up a pack of cheap toothbrushes as well; again, a handy addition
to the toolkit.
The final item in the arsenal is glue. Personally, I keep three types in
my kit. Thick superglue, polystyrene cement and PVA glue. Between the
three they will cover every sticking job you will encounter.
That just about covers it. With the items I've mentioned you should be
able to get started with your modelling. As you progress and gain
experience you'll come up with all manner of odd things that you will
add to your toolbox. There will be some items you might need that will
costs a good few pounds like a hobbyists drill (Dremel or similar) but
my advice is to keep your eyes open as you go around the shops. Tools
that can be used by modellers can be found in the most unlikely places
and always watch out for special offers from discount supermarkets. Aldi
and Lidl both offer an email newsletter service so can you find out
about special offers in advance. There are of course plenty of sources
online for buying specialist modelling tools, but always try to get to
major model shows as there are usually stalls selling tools at these
events. Once you get to the stage of finding you are using something to
do a job it was never intended for, and have developed a tendency to
never throw anything away (well, it might come in handy someday!), then
you'll know you've become a fully fledged modeller.
![]()
Removing Decals - Donald Grant
Most decals on "off the shelf" model buses can be removed relatively
easily and there are several methods that can be used. Here's my own
particular favourite. Nail varnish remover will dissolve decals and if
done carefully will leave the paintwork undamaged. It can be done
without dissembling the model with relative ease.
Quite simply dip a cotton bud in the liquid and then start to rub away
the decal using a circular motion pushing down firmly (but not too hard)
on the model. Don't worry about using too much liquid, make sure the bud
is well soaked. When the decal begins to dissolve change over to the
clean end of the bud again making sure it is well soaked in the liquid.
It is important to change over to a clean cotton bud at regular
intervals always ensuring that the cotton bud has plenty fluid on it
otherwise the decal will begin to harden again and can be extremely
difficult to shift.
There is sometimes a dulling of the paintwork when a decal is removed
but is generally not a problem as it's usually hidden by the new decal
you are going to apply and by the coat of varnish applied to "fix" the
new decal to the model. I always advise trying it out on an old model
first time around because if you make a mess of it then there's no real
harm done but you will have gained a little valuable experience and will
still have a model you can use to repaint into a new livery.
![]()
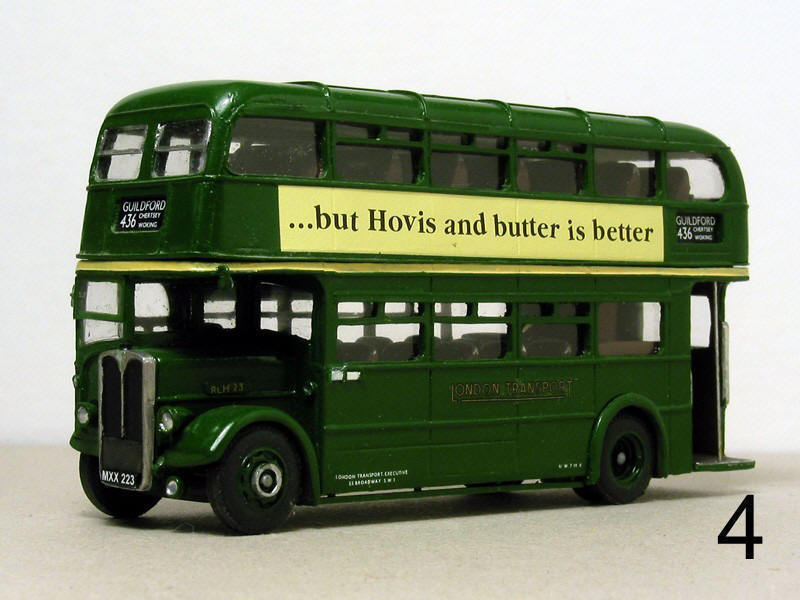
Detailing -
Rod Blackburn
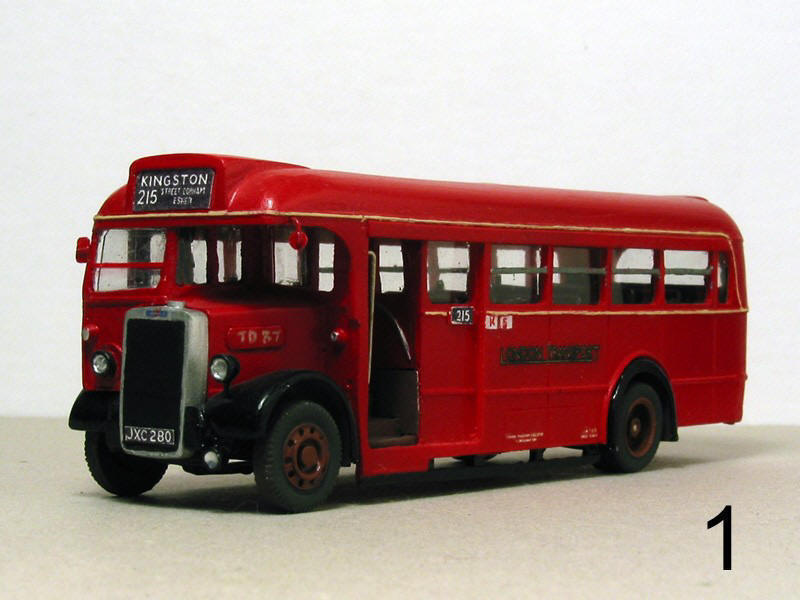
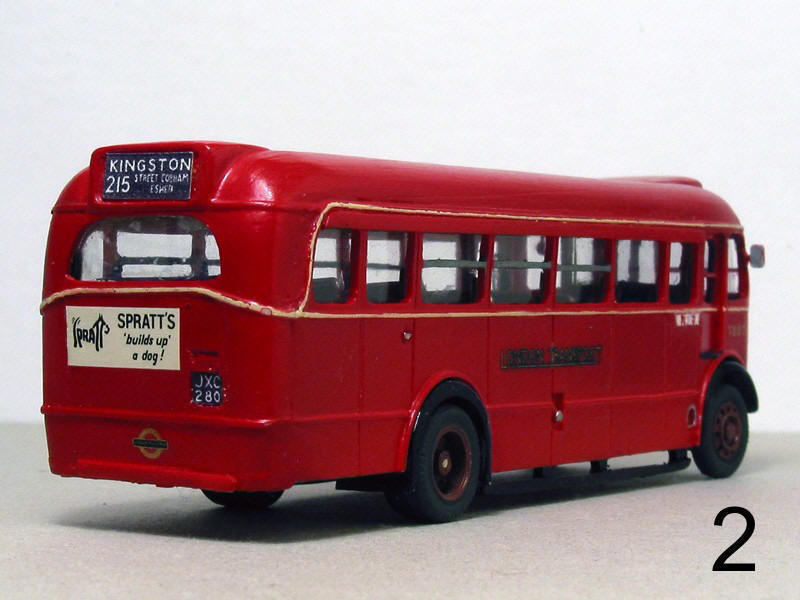
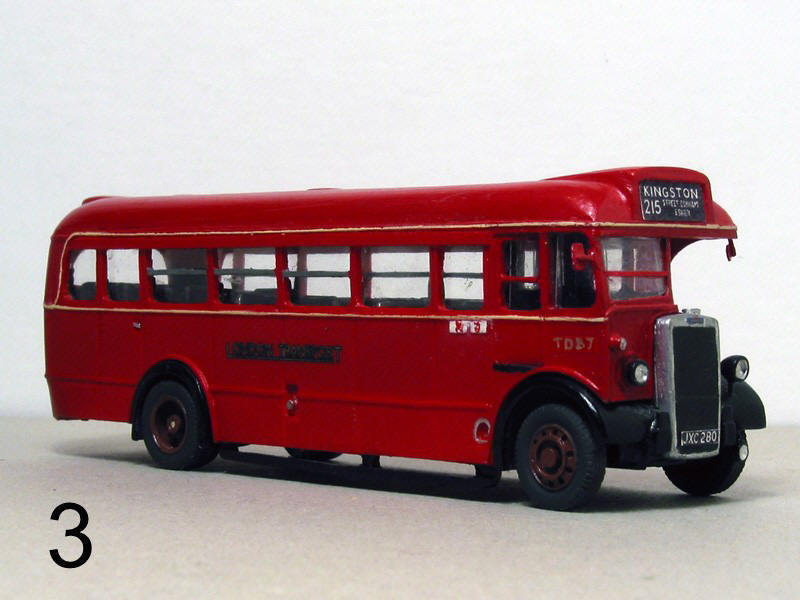 Pictures
1 to 3 - Little Bus Company kit of
London Transport's TD Class. An early LBC kit due for re-issue and a new
master, this kit was built in about 1998. Rain shields were modified and
the rather flat roof was given more curve. Driver's mirrors were added.
Blinds and registration hand painted four times model size and reduced
in a photocopier (no inkjet printing then). Picture 1 shows
modifications to
headlights, radiator grille and dumb irons. Picture 2 shows the unusual
offset rear advertisement. Picture 3 is another view of the front end
modifications.
Pictures
1 to 3 - Little Bus Company kit of
London Transport's TD Class. An early LBC kit due for re-issue and a new
master, this kit was built in about 1998. Rain shields were modified and
the rather flat roof was given more curve. Driver's mirrors were added.
Blinds and registration hand painted four times model size and reduced
in a photocopier (no inkjet printing then). Picture 1 shows
modifications to
headlights, radiator grille and dumb irons. Picture 2 shows the unusual
offset rear advertisement. Picture 3 is another view of the front end
modifications.
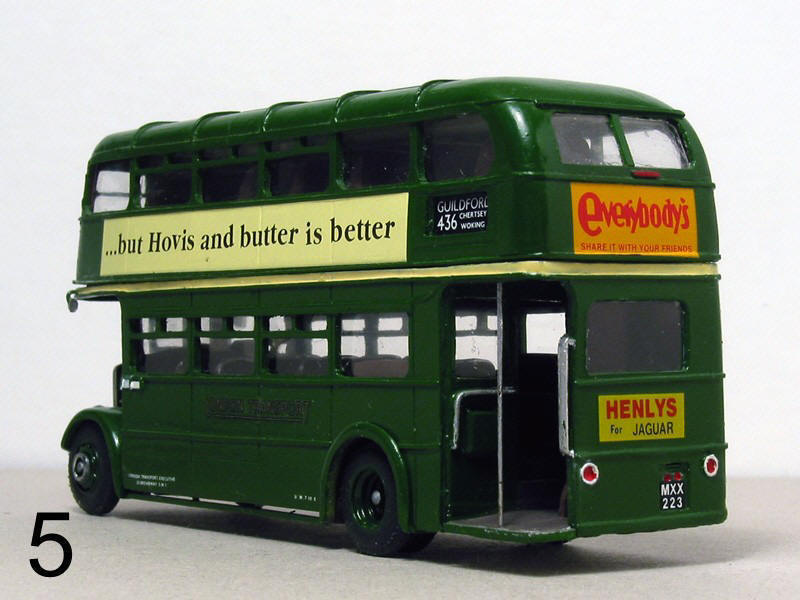
 Pictures
4 and 5 - Little Bus Company kit of
London
Transport's RLH Class. Built in 2001, new headlights and a fog light
were made and driver's mirror's added. The upper deck emergency window
centre pillar was corrected. Picture 4 shows the front end
modifications, including a bulge in the bonnet (behind the headlight).
Picture 5 shows the revised window.
Pictures
4 and 5 - Little Bus Company kit of
London
Transport's RLH Class. Built in 2001, new headlights and a fog light
were made and driver's mirror's added. The upper deck emergency window
centre pillar was corrected. Picture 4 shows the front end
modifications, including a bulge in the bonnet (behind the headlight).
Picture 5 shows the revised window.
 Pictures
6 and 7 - Little Bus Company kit of a United Counties Bristol KSW. Built
in 1999, there was some modification to the front of the cab to improve
the fit with the wing. Indicator recesses were cut in the front and rear
and additional small windows were cut out on the lower deck. Idleness
has prevented the acquisition of appropriate fleet name transfers.
Driver's mirrors added. Blinds and registration made as for the TD,
above.
Pictures
6 and 7 - Little Bus Company kit of a United Counties Bristol KSW. Built
in 1999, there was some modification to the front of the cab to improve
the fit with the wing. Indicator recesses were cut in the front and rear
and additional small windows were cut out on the lower deck. Idleness
has prevented the acquisition of appropriate fleet name transfers.
Driver's mirrors added. Blinds and registration made as for the TD,
above.
![]()
Dismantling the OOC Optare Solo - Donald Grant
Using a Stanley knife insert the blade
between the roof and rear section and lever it up enough to create a gap
big enough to slip a six inch steel rule into. The rule only needs to go
in a short distance. I used a scale conversion steel rule which is very
thin and quite narrow. Use the rule to lever the roof upwards away from
the back. You could probably use the Stanley knife to lever up the roof
but if you wish to retain all your fingers and the full eight pints of
blood I wouldn't risk it in case the knife were to slip. You could give
yourself a very nasty injury indeed.
I found that after very little pressure the roof shot off and the door
fell out! The glazing can then be removed but do it carefully lifting it
from the back first. You'll find when you get the glazing unit out that
the windscreen wipers are still in place but they should be easy enough
to push out, from behind. The seating unit will also just lift out when
the glazing has been removed and that's it. Apart from removing the
wheels and axles in the usual way the job is done.
![]()
These tips I have learnt whilst assembling white metal and resin models but you can equally apply them to a die cast model.
A good quality paintbrush is essential in modelling, the sable hair type from your local art or craft shop, although more expensive, will give a nice smooth and even finish.
Aerosols
- I have on occasions successfully sprayed my models with aerosols from
a car accessory shop when I can get a match. Be warned though; do not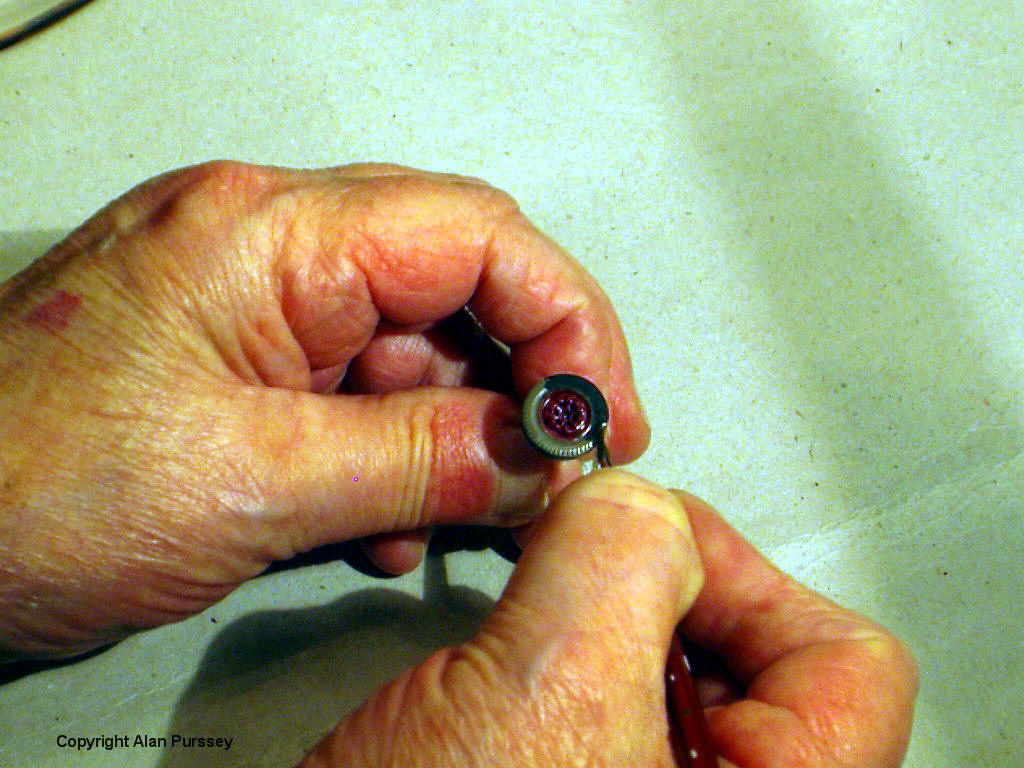 paint cellulose-based paints on top of oil-based paints, although the
reverse is possible: and do not mix cellulose paint with acrylic. If
using an aerosol can, warm up the model with a hairdryer as the gas in
the aerosol is cold and cools the model resulting in the paint drying to
a matt finish. Do follow the manufactures instruction on the can.
paint cellulose-based paints on top of oil-based paints, although the
reverse is possible: and do not mix cellulose paint with acrylic. If
using an aerosol can, warm up the model with a hairdryer as the gas in
the aerosol is cold and cools the model resulting in the paint drying to
a matt finish. Do follow the manufactures instruction on the can.
Several thin coats are better then one thick coat and this applies whether using a brush or a spray. Where I can I prefer matt paint; it covers more evenly and does not obscure small details, and after applying transfers, can be varnished. Do experiment, as the colour will change after applying the varnish. Before glazing, paint the edges of the windows in matt black to give a slimmer impression to the widow bars.
 Wheels
- after cleaning up, whether they are cast metal or rubber, place them
on the wire axels provided in the kit, make sure they are square, then,
holding the wire between your thumb and fore finger, load a fine brush
with paint and as you place the brush to the wheel gently twist the
wheel into the brush for a clean straight line between the tyre and the
wheel hub.
Wheels
- after cleaning up, whether they are cast metal or rubber, place them
on the wire axels provided in the kit, make sure they are square, then,
holding the wire between your thumb and fore finger, load a fine brush
with paint and as you place the brush to the wheel gently twist the
wheel into the brush for a clean straight line between the tyre and the
wheel hub.
White-walled tyres - in the early thirties London General white-walled the sides of the tyres on their buses. To replicate this on some of my models I have used white Indian ink: it looks more realistic than matt white paint.
Headlights, sidelights, door handles, and rear stop lights I treat with my trusty fine cocktail stick, dip the stick gently into the paint and supply a small drop to the object. With a little practice it becomes easy.
When painting a silver roof, I have found that the proprietary silver paint varies and can
look rather heavy and patchy on a small-scale model. If the model is
resin with the roof part of the body then you will need to use masking
tape around the roofline. Prime with acrylic spray: it must be acrylic
otherwise it will react. Try an Autoglym wheel silver aerosol - it
covers well, and has a very fine spray, and it gives a professional
finish with a slight weathered look without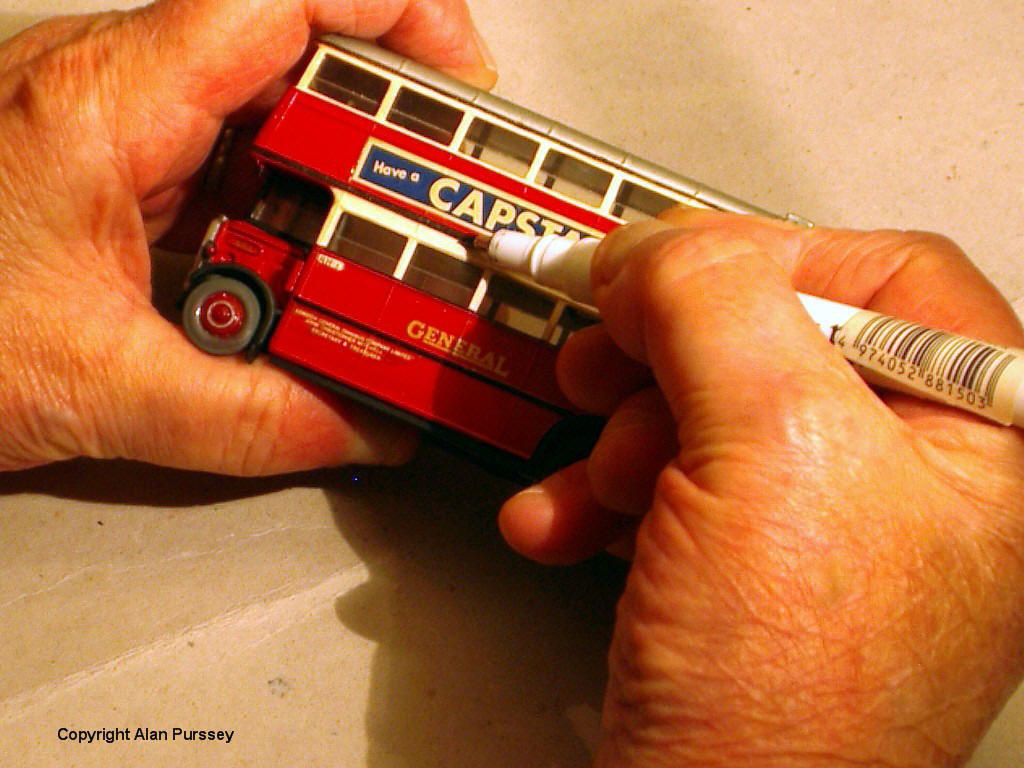 obscuring the fine detail.
Fine lining
- another concern to the modeller is the lining found on early buses and
coaches, usually to cover panel joints, or rain strips. I have
successfully used calligraphy pens from the art shop, which are
waterproof and come in various colours I use the red and black for my
London fleet, tip sizes are 0.5mm, 1mm, and 2mm. If you make a mistake,
it can easily be rubbed off before it dries. Trimline is made from ultra
thin, self-coloured hi-tech film, it is permanently adhesive when
applied to a clean surface and rubbed down. It is resistant to peeling
and creeping. It can readably deform around complex curves and corners
without lifting or shrinking. Each pack comes in a 2½ metre length and
in eight
 different widths: 0.5mm, 0.8mm,1.3mm, 2.1mm, 3.3mm, 5mm, 7mm
and 10mm, and is available in red, green, white and black. Most model
shops stock this item.
different widths: 0.5mm, 0.8mm,1.3mm, 2.1mm, 3.3mm, 5mm, 7mm
and 10mm, and is available in red, green, white and black. Most model
shops stock this item.
Weathering for engine louvers and grills - thin down some matt black paint, load the brush, then brush off the surplus onto a piece of card, then gently stroke across the louvers and wipe with a tissue, the resulting shadow highlights the louvers. The same can be applied under fuel caps to replicate oil spills down the panels.
Weathering bodywork- my wife came up with the idea of using some of her eye make-up shades to brush lightly along the sides of the model, and if your first attempt is unsuccessful it can be removed quite easily. Then apply some varnish. Do remember to ask her indoors first!!
Paint Mixing -
It is essential to stir paint thoroughly: whether this applies to
household or the modelling variety, the solution was to stir vigorously
using cocktail sticks, small screwdriver, even paintbrushes with varying
degrees of success.
If like me you have kept paint for some time, have often found it has
settled to the bottom of the tin.
The Badger Paint Mixer from the airbrush company is designed to fit
standard modelling tins. It is approximately 7 inches long with the stem
attached which slides into the body. Two AA size batteries are required
to operate it. It weights under 4 ounces and fits into your hand
comfortably with your thumb operating the on / off switch which is
spring-loaded, leaving your other hand to steady the tin. The design is
such that the degree of mixing is far superior than can be done by hand
alone and much quicker.
Before operating it is essential to immerse the mixer into the paint,
and, when finishing, switch off before removing.
Cleaning is a breeze, just wipe the end with a cloth or tissue to remove
the surplus paint: placing the end in thinners and switching on for a
few seconds will remove all traces of paint.
I have always used an old miniature whiskey bottle with thinners to
clean my paintbrushes and this is ideal for that purpose replacing the
lid alleviates smells and evaporation (it's also pleasant emptying the
bottle in the first place!).
They retail around £12.00.
![]()
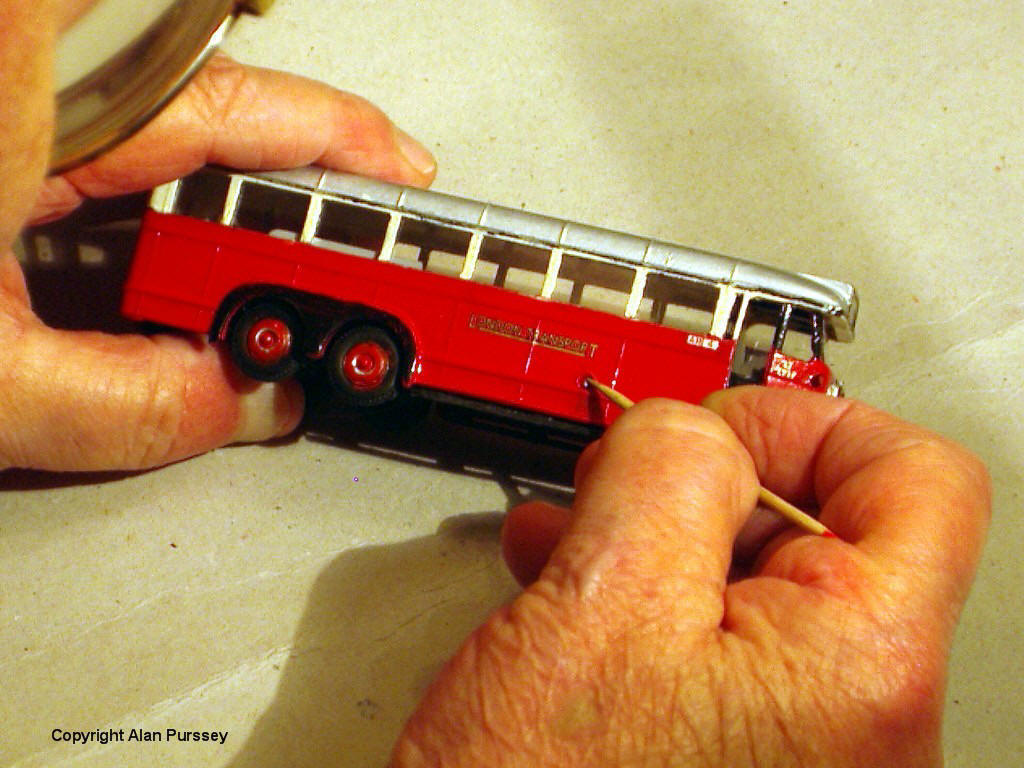
Transfers, waterslide, applying - Alan Purssey
Tony Asquith’s
Little Bus Company website includes
tutorials on applying transfers to models whether they be kits or
die-cast.![]()
Be aware that the carrier film varies from one supplier to another, i.e. some transfers need immersion in warm water for maybe two minutes, others can be as little as a few seconds.
Some decal sets are designed to compliment many of the white metal, and resin kits currently available to enable modellers to finish a particular vehicle. Some of these sets contain very small items such as number plates, garage codes, and radiator badges. These can be tricky to apply.
Separate the items first using a steel straight edge and a sharp scalpel, and set aside.
Hold the item with a pair of eyebrow tweezers after immersion in warm water, gently tease the transfer with the end of a wooden cocktail stick (they have a fine point) onto the surface of the model; if you moisten the surface firstly it will slide more readily into position.
Finally when you are happy with the position use the end of a kitchen towel to absorb surplus water, when dry apply a varnish of your choice.
![]()
Transfers, waterslide, making - Sean Coyle
I have been producing my own waterslide decals since 1999 and
using them for my own code 3 conversions and supplying them to friends
for their models. Making your own decals isn’t a hard job really but
some basic computer skills and imagination are essential. I currently
have an eBay shop and at present I’m supplying decals via this media. I
have a range of decals at the moment and can provide decals at a
reasonable cost. If you fancy having a bash at making your own decals
then I have provided this special tutorial sheet exclusively to
Worldwide Model Buses.
When I design decals I sometimes use a few different paint programs to
create certain effects but most of the time I just use the basic paint
program that comes with every home computer which is “Microsoft Paint”.
This program is very basic and easy to use. Getting your decals accurate
requires the following attributes:
1) Font 2) Design 3) Colour 4) Scanned images 5) Size reduction 6)
Choosing the correct paper to use 7) Printing 8) Glossing the decal
sheet
Fonts
The key to making your decals look good starts when you first design
your decals. Getting the correct font (the lettering type), or very near
to the correct font, is essential if you are aiming for accuracy. Every
business in the world uses different fonts, some of which are basic i.e.
“Arial” and every computer has at least 50 or more fonts pre-installed
and you might find you have the correct font you need for any particular
fleet name. If you know which font type you require for a fleet name
then you can usually download it free from the internet and install the
font on your computer. If however you are not sure of the font type then
don't be shy: email the company and explain to them what you are trying
to replicate; they may tell you the font type and even assist you with
other detailing for you to copy i.e. logos and use.
Design
As mentioned above, a good design will result in a good looking decal.
If you study any particular logo for any bus company then you will
immediately notice that it’s made up of a series of shapes. By
recreating these shapes in your paint program you can make just about
any logo imaginable by layering your individual shapes on top of each
other until you have the design required.
*Tip when designing your logo, don't make it too big or too small.
Remember in almost every program you have the option of zooming in to
your object or design. You will be reducing the size of the image later
on!
Colour Matching
Colour matching is essential. What may look correct on the computer
screen doesn’t always turn out to be the same colour when printing your
final design onto paper. In all paint programs you have the option to
tweak your colours. What I usually do, if I’m trying to get a certain
colour accurate to what I’m modelling, is to make my own series of small
patches/swabs of a certain shade of say “Yellow” for example. I then
note every colours pallet numbers for each shade I intend to match
(these are the numbers shown in your custom section of your paint
table). Then once I have a few different shades I print them on photo
paper with my printer set to “Photo quality” and once the ink is dry I
compare it to what I’m modelling for the closest possible match.
Scanned Images
Scanning images can be the easiest ways to replicate a company’s logo.
If you are going to go down this route you have to have a decent image
to scan from. In most cases the company’s logo will be far too big for
your scanner and usually they are attached to a bus, so the next best
thing to do is to photograph the image.
Once you have your photographs and they are transferred onto your pc
then the next thing you want to do is remove what ever is in the
background of the logo. This can usually be done by tracing the image
with the photo software/program or, in Paint, you can erase the
background very carefully by using the eraser tool. The aim in this
process is to have only the logo you are trying to replicate set on a
white background.
Size reduction
Once you are happy with your image you will need to reduce the size of
it in order to make it fit your model. The easiest possible way to do
this is to use the “select” tool in your Paint program and select the
image by going as close to the edges of it as possible then once you
have the entire logo selected you want to “Copy” it by right clicking
your mouse and scrolling down to “copy”
Once you have the image copied you can now paste it into Microsoft Word
or another equivalent program. The image will still be too big for your
model so you will need to reduce the size of it. The way to do this is
to right click the newly pasted object and go into ‘properties’ and
select size. It will give you the exact dimensions of your copied
object. Now you can change these sizes to a size that is more in
contrast to the scale of the model. Remember that these sizes are all
metric and are in cm/mm. A basic calculation is there is 10mm to 1cm and
every mm is one tenth of a cm. Once you have cracked this, then re-sizing is a
doodle.
Choosing the correct paper to use
Decal paper comes in either clear or white paper. The colour of
paper will have to be taken into consideration to suit the logo.
Remember printers cannot print White, and lighter colours soon disappear
once transferred onto a model if they are printed on clear
decal paper and the model paint is a dark colour.
Printing
Once you have finally laid all your decals out on your spread sheet
then you are almost finished. For best results always print a test page
on a plain piece of paper first as this will save your decal paper.
Print your decals out on a normal setting on plain paper and then once
dry cut the logos/ fleet names out and offer them to your model dry.
This will give you the opportunity to see how your scaling has worked
out and if it’s not correct you can then go back into the ‘properties’
and reduce or increase the size to suit.
Finally once you are satisfied with all your artwork then you can now
print off your final copy. When printing, set your printer to “Photo
Quality”, and then print.
Glossing the Decal
Once you have printed the decal off you will need to leave it a good
while before the ink is dry to gloss it. Glossing the decal with clear
Lacquer will make it water resistant and allow you to immerse it in
water. Don't go heavy with the lacquer as too much lacquer will make
your ink run and too little lacquer will cause the ink to run when
immersed in water and the decal will break up too. For best results give
it a nice even spray and ensure the entire surface of the paper is
coated with lacquer.
Once lacquered allow it to dry for at least an hour and then you are ready to apply the your decal to your model.
Sean decals are to be found on eBay against the sellers name ‘sean2476’.
![]()
Weathering Model Buses - Rapido Trains UK
A video posted by Rapido Trains UK showing the process of applying a realstic weathering effect to a New Look Guy Arab model.
Advanced Model Weathering - Laser Creation-World
An amazing video posted by Laser Creation-World showing the process of converting an off the shelf 1:43 scale model bus is to an Apocalypse Vehicle.
![]()