Reigate Garage
A diorama constructed by Siggy de Reuther
Building a Diorama - The creation of Reigate bus garage diorama
INTRODUCTION
Not only is a diorama a very effective and visually pleasing way to
display part or all of your collection of model buses, it is a
three-dimensional "snapshot" of a given moment; a three dimensional work
of art. Creating a diorama can become a hobby in its own right and can
be a very enjoyable pastime.
I hope this guide will provide you sufficient information taking into
account various considerations so to avoid costly mistakes,
both financially and time-wise. Using the construction process of my
Reigate bus garage as an example, I will examine each and every step
along the way right from planning to fully constructed display. The
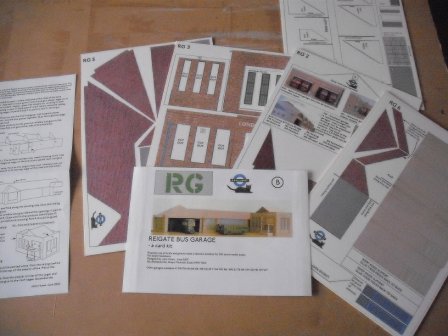
original intention was to demonstrate the construction of a John Howe
card kit of Reigate but I thought I would expand on this idea beyond the
scope of the kit to a complete model scene.
BEFORE GETTING STARTED, PROTOTYPE SETTINGS
 Even before you starting cutting the timber for the baseboard or even
making the first card model, there is quite a good deal of information
that can be gleaned by various methods. There are several areas of study
open to us. First, if the location you intend to model still exists,
then it is worth making a visit and taking a few photographs for
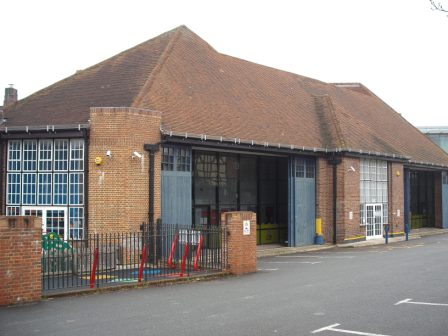
reference. I am fortunate in that when Reigate bus garage was built the
frontage had to be in keeping with the surrounding buildings and as such
is a listed building. Part of the garage still exists today, converted
into a local nursery. Although the buses have long-gone, the frontage
remains essentially intact (photo left). Visiting the real location
is advantageous especially if you are only relying on historic
photographs that may only show one perspective. Another way maybe to
consult a local library or records office to see if they have any
photographs or material that could aid your research. Remember that a
diorama is much more than just buses so it may be possible to find out
details about surrounding buildings, when they were built, the
businesses that occupied premises and so on. In this way it is then
possible to decide exactly how accurate you want the diorama to be.
Even before you starting cutting the timber for the baseboard or even
making the first card model, there is quite a good deal of information
that can be gleaned by various methods. There are several areas of study
open to us. First, if the location you intend to model still exists,
then it is worth making a visit and taking a few photographs for
reference. I am fortunate in that when Reigate bus garage was built the
frontage had to be in keeping with the surrounding buildings and as such
is a listed building. Part of the garage still exists today, converted
into a local nursery. Although the buses have long-gone, the frontage
remains essentially intact (photo left). Visiting the real location
is advantageous especially if you are only relying on historic
photographs that may only show one perspective. Another way maybe to
consult a local library or records office to see if they have any
photographs or material that could aid your research. Remember that a
diorama is much more than just buses so it may be possible to find out
details about surrounding buildings, when they were built, the
businesses that occupied premises and so on. In this way it is then
possible to decide exactly how accurate you want the diorama to be.
Transport books and internet searches will also aid research. Beyond
that there is always asking local people or joining a web-based bus
group. There are numerous Yahoo! Groups for those with an interest in
individual bus companies or vehicles together with three model bus
groups, namely, Diecast Buses Interactive, Model Bus Builders and
Worldwide Model Buses.
Once you have gathered all the data you need it is then worth taking
some time to see if all you want to re-create will fit in to a diorama
space. For practical reasons at no point should a diorama be constructed
that will be wider than your own arms reach. This is not the only
limiting factor but possibly one of the most important. The other of
course is the matter of where you intend to display your diorama. If it
is your intention to also publicly exhibit then it is worth thinking
about how you will transport it, will it require another person to carry
it, will it pass through your doorways or fit into your vehicle.
Another consideration is the time factor. I find that I spend around 100
hours on each diorama from planning to completion. Your own lifestyle
will dictate whether you are able to do this. It maybe that you can only
spend 1 hour per week on this hobby but the important thing to do is to
enjoy it. I personally find all the stages to be therapeutic relaxation.
Once you have in your mind what you intend to build, the next stage is
work out whether you are happy with "off-the shelf" products, kits or
even scratch building.
Sometimes even with so many research resources it may be that it
is not possible to find photographs of every building. When I started
building
Reigate, I soon realised that it was highly unlikely that I would find a
rear view of the (now demolished) former East Surrey Traction office
building. If you are building a cityscape diorama sometimes it is either
not possible to include every floor of a tower block either for reasons
of space or simply because an exact copy will totally dwarf the model
buses you want to display. Similarly trees can reach heights of 120ft
but on a diorama these can appear oversize if replicated exactly.
Therefore we need to use artistic licence and reduce sizes so the
overall impression is maintained. I find the best guide to this is the
old adage "if it looks right, it is right".
HOW MUCH DOES A DIORAMA COST TO BUILD
Largely this will depend on the choice of materials used and how much
work you actually undertake yourself. Using Reigate as an example, I
purchased one 8ft by 4ft sheet of 6mm MDF (micro density fibre) board
retailing at around £15. Add to this wood glue (£2.50), screws (£1.50),
planed 33mm x 12mm timber lengths (£14.00). Using the DIY cutting
service at 50 pence per cut, the total came to under £40.00. Obviously
if you are building further dioramas then the overall costs will be come
less, wood glue for example will be ample to not need to buy further. If
you are incorporating this diorama in sympathy with your furnishings
then additional expense will depend largely on the facing trim you use.
If you are intending to build all scenic structures from card kits,
these vary from around £6 up to around £15. Sometimes there are no
off-the shelf ready built products or kits suitable or you may even
prefer the challenge of scratch-building every structure, these costs
will be less; the card from a cereal box could be used, coloured card
and mounting board from an art shop is relatively cheap. It should be
noted that scratch-building will require a great deal more time to
construct any buildings.
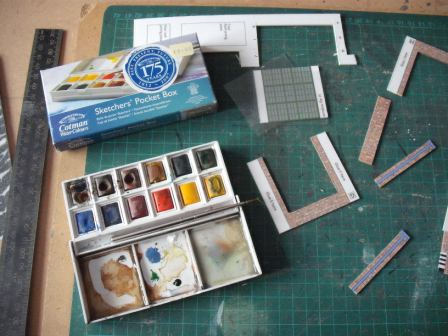
The construction of the cabinet has been kept straightforward and uses
the minimum of tools and woodwork skills. It may come as a surprise at
the simplicity of construction without compromise of sturdiness. The
only tools employed were: a tenon saw, a screwdriver, a set-square,
bradawl, drill (either electric or hand would do), Stanley knife and a
pencil.
BASEBOARD
AND
CABINET CONSTRUCTION
The first task with any diorama is to plan and build a base on which to
place the diorama. For this I use two materials, 6mm MDF and 12mm x 33mm
planed timber.
For
Reigate
I have to accommodate other items above this so the whole diorama will
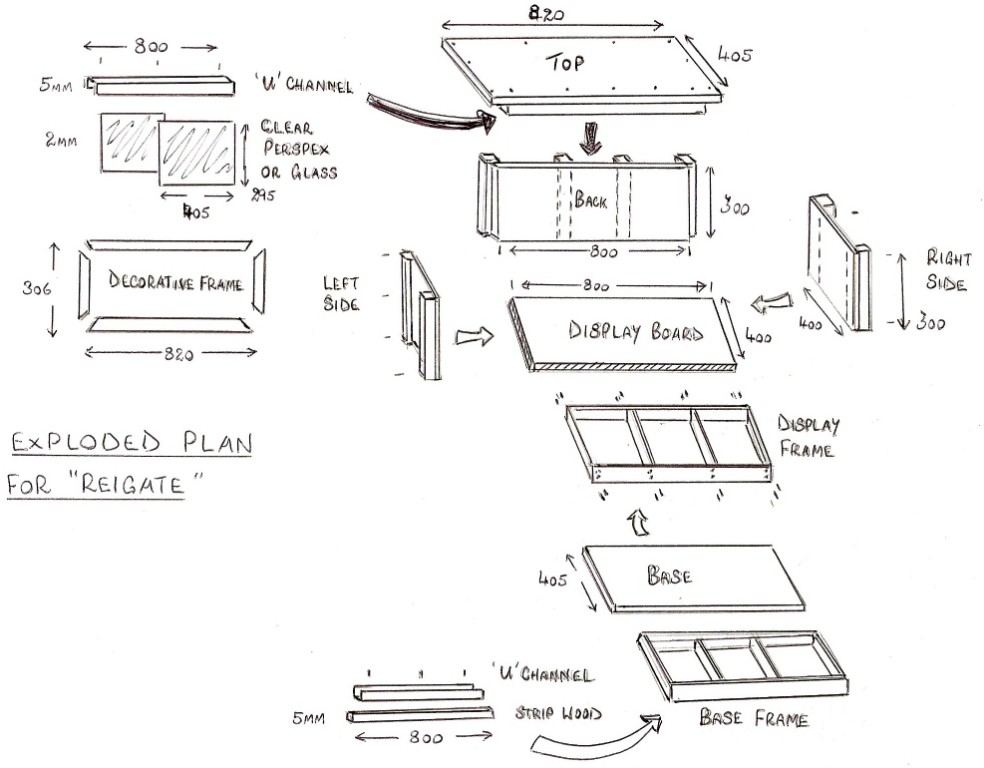
sit within a cabinet. The exploded plan above shows how the various parts fit
together. Whether you are building this within a home-made cabinet or
just the baseboard, the latter item is required in each case.
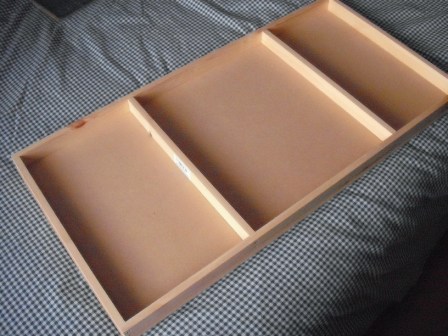
Taking an MDF board (in this case 800mm x 400mm) a wooden frame is
required to aid rigidity and to avoid warping. The planed timber is cut
and screwed and glued (with wood glue) using simple butt joints. The MDF
is then glued and pinned, I use 15mm long panel pins and No. 6 3.5mm x
25mm super screws for the timber. The photo (below left) shows the wooden
frame completed.
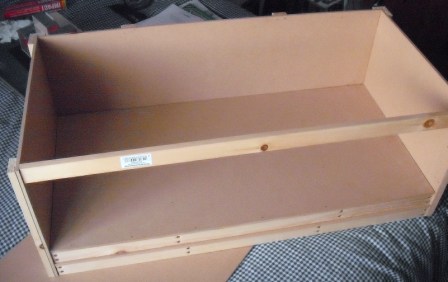
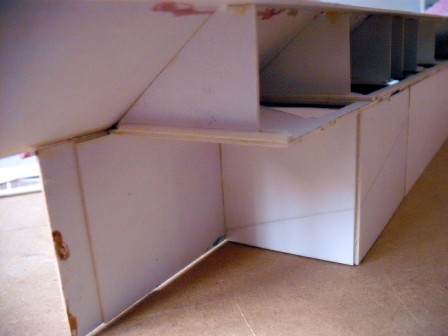
 If you are building the cabinet, the basic construction is shown in the
photo (above right). For photographic purposes, the top has been left off.
This uses the same materials as the board. The base is an exact repeat
of the diorama shelf but slightly deeper. The two sides and rear have
vertical lengths of timber to add strength pinned and glued.
If you are building the cabinet, the basic construction is shown in the
photo (above right). For photographic purposes, the top has been left off.
This uses the same materials as the board. The base is an exact repeat
of the diorama shelf but slightly deeper. The two sides and rear have
vertical lengths of timber to add strength pinned and glued.
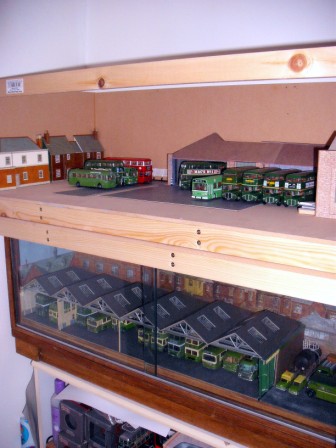
The photo on the right shows the partially completed Reigate diorama in
situ above a previously completed Southdown scene. This photo also
illustrates why the diorama is not built directly into the cabinet as
the baseboard shelf will need to be removed to add many more scenic
details as well as the background.
Scenic ground plan
GARAGE CONSTRUCTION
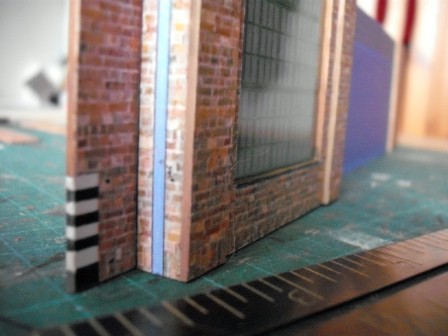
The photos below show various stages of construction. The photo on the
right shows detail of one of the corners
and while the paint colour is not quite an accurate match, when viewed
complete the eye will blend this and so it will not look wrong.
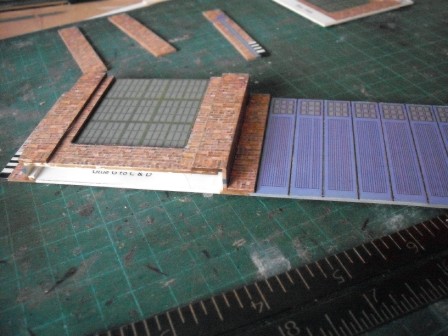
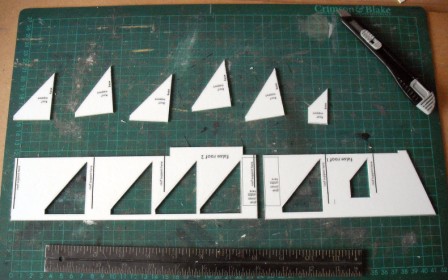
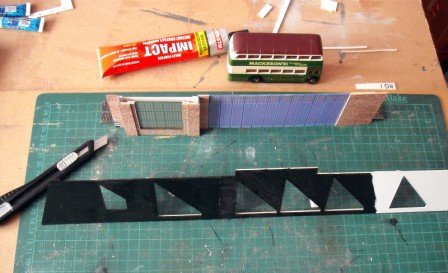
Next the roof support and false roof is to be constructed. The supports are within the false roof and require cutting out (below left). The false roof is in two parts and these are joined together, making sure these are kept straight. As the kit is only of the garage frontage I am not going to add any detailed roof framing but the false roof will be seen so I painted the "viewed" area matt black (below right).
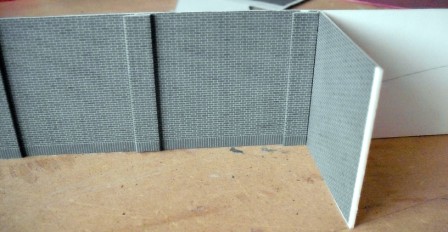
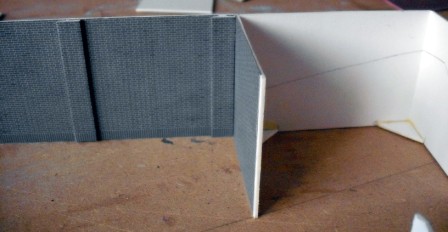
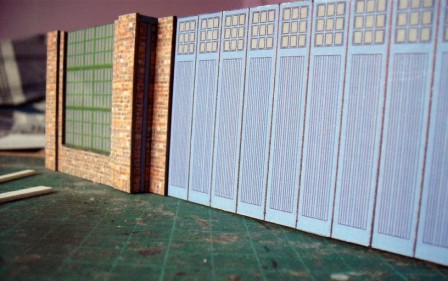
Because this kit only includes the frontage I thought it would be a good idea to make a rear wall. For this I have used the Superquick engineers blue brick sheets mounted on art board (artists mounting board) of similar thickness to the kit. A close-up (above left) shows this in greater detail. The rear wall is continued beyond any potential viewed area to add further rigidity and support for the roof. As I am intending to place the completed garage against a back wall, a false wall is included to stop any model buses from potentially rolling back to an inaccessible area. Note also that to keep the structure square, the waste card from the window apertures has been cut into right angle triangles. (above right)
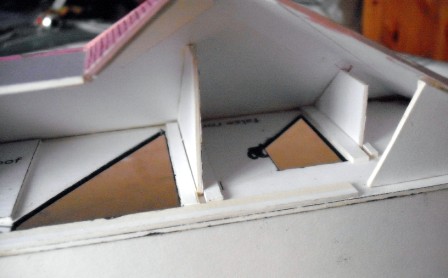
Due to heat, most card kits will generally warp so it is a good idea to use any scrap card where possible to brace the hidden areas. The pictures above illustrates this and additional strengthening of the roof.
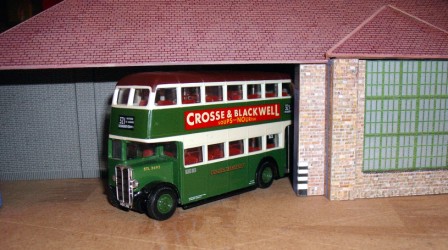
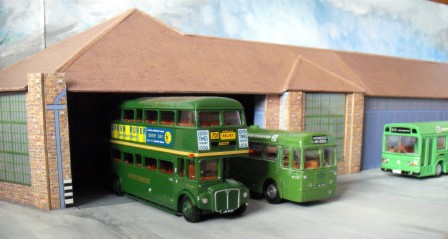
Moving to the roof, this is perhaps the trickiest area to get right and
requires careful fettling to get the angles right. Before finally gluing
the roof in place it is a good idea to check the clearance. There is no
better way than to visually do this than with a model bus.
LANDSCAPE CONSTRUCTION

Once the basic Reigate Garage kit was built consideration was given to
the surrounding landscape. In reality, the garage was situated just a
short distance from the junction will Bell Street; the end building was the one-time
offices of the East Surrey Traction Company, the predecessor of London
Transport Country Buses. It would prove fruitless to search for any
photographic evidence showing the rear of this building so artistic
licence is required to create a believable diorama. To this end the rear
sections of two Superquick card kits would be substituted modified as
half-relief buildings (above left). These buildings are mounted onto
a section of art board to be "plugged in" to the diorama once complete.
By adopting this modular approach has the advantage that this small
section can be worked on and fully finished with obtrusion (above centre).
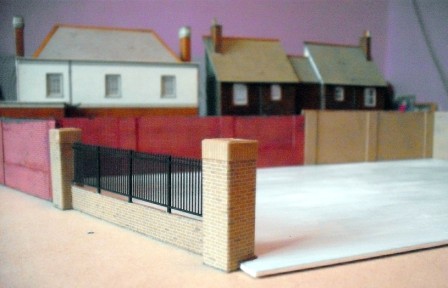
To maximise the display area for the model buses it is assumed that a
large hard-standing yard occupied the space between the rears of these
buildings and the garage. To enclose this yard, a surrounding wall was
built using two contrasting brick papers, the impression is that a new
extension has been given to the yard area. These walls are built from a
length of card, overlaid with Superquick and Metcalfe brick papers
(above right).
Next we turn our attention to the ground. To create the concrete hard
standing art board is again used, suitably painted in a light grey, not
forgetting to add the weathering. This is made by varying the shades of
grey by mixing more or less white or black paint. The whole garage
forecourt and garage floor is in fact a "jigsaw" of card made in this
way. Visually it is better to again plug in the buildings rather than
position them on top of the card (below left). The easiest method to
achieve this is to carefully follow the outline of the garage walls and
then remove the card where the garage walls will rest.
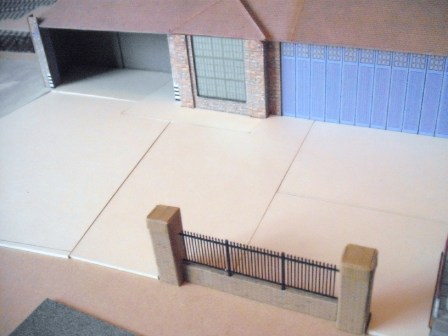

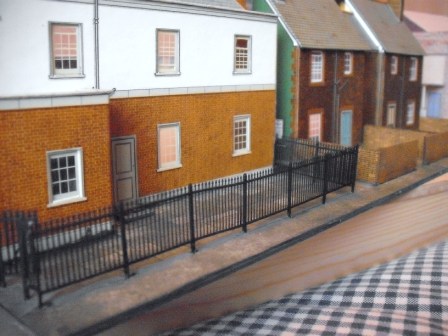
Separating the forecourt area from the pavement is a fence set within a brick wall. Taking scrap card, pillars were created, again overlaid with brick paper. Between these pillars the fencing was set into the wall. To create this, three layers of card were glued together, the middle card first having cut-outs to accept the fence posts. The fencing is Ratio G.W.R. fencing painted matt black and cut to desired lengths (above centre). Rather than use the card fence around the office entrance, further sections of the same Ration plastic fencing were used. However this is adapted by halving the height, using the lower part only, suitably painted in white for the railings, brown for the top rail (above right).
Moving to the street, Metcalfe tarmac sheet sections were laid. The
pavements are made from Superquick pavement sheets glued onto a thin
card which was shaped around the buildings and walls (above).
Separating the yard from the road at the entrance is a cobbled stone.
Metcalfe produce sheets of these.
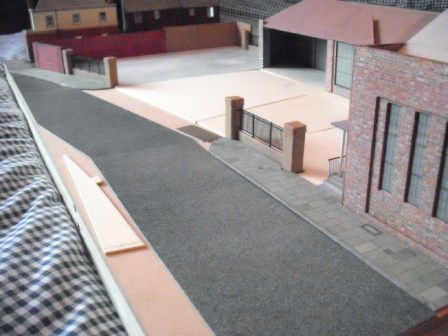
THE BACKSCENE
 The backscene is an important part of the scenic display as it puts the
model buildings and all that is to be displayed into a context, part of
a greater area than we can display. Skilful use of the backscene will
help create the illusion of space and also include a two-dimensional
depiction of something that there simply is not space for on the
baseboard.
The backscene is an important part of the scenic display as it puts the
model buildings and all that is to be displayed into a context, part of
a greater area than we can display. Skilful use of the backscene will
help create the illusion of space and also include a two-dimensional
depiction of something that there simply is not space for on the
baseboard.
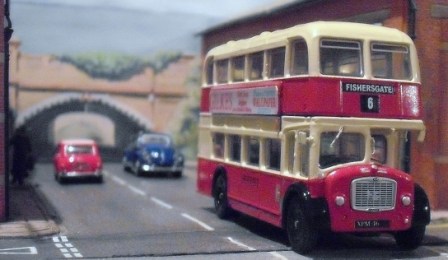
On my
Conway Street
diorama, there is a railway bridge that the could not be accommodated so
a water-colour painting of it was made (see photo to the left).
Various backscenes can be purchased from model railway manufacturers,
ranging from printed artwork of sky or town or country to expensive
panoramic photographic reproductions. It should be noted that any of
these scenes are aimed at the model railway and as such depict views
"along the line". There are other alternatives depending on your
artistic leanings. A good cheap way is to use the photographs from large
calendars. One point worth considering is that more distant features are
faded, closer details will have stronger colours. It is also worth
considering the time of year you want to portray. For example, if you
intend to model a summer scene with open top buses it is no good having
a winter backscene with trees devoid of trees. The other alternative is
to paint your own scene to suit your diorama. This can be done with
watercolour paints or even coloured pencils.
Backscenes can be made in various ways, long lengths of card or a
board, mounted at the rear and side(s) of the diorama. Whether using
printed backscenes or creating your own, these are best applied in the
same way as hanging wallpaper. However on
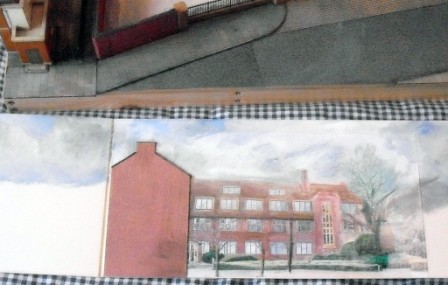
Reigate, I decided to paint my own backscene directly on the board. This
is simply constructed from artists mounting board, glued back-to-back to
create a rigid structure. Keep in mind that the thickness of this
backscene will need to be left at the rear and sides of the baseboard. I
chose a light ivory colour board and then gave the viewable areas a wash
of blue to depict sky, adding shades of grey to white to represent an
unsettled day that is neither sunny nor overcast. The positioning of
buildings was marked so I could then add backscene buildings, in the
case of
Reigate
this is the rear to the left-hand side. I used an actual photograph I
had taken of the former London Country offices but with a difference. By
printing a draft copy in greyscale, I had a copy of the building which I
then painted on the colours, this helping to suggest that the building
is set a little way distant. To cover the left-hand end of where this
photo stops, an end of a building was simply constructed in thin card,
covered with brick paper.
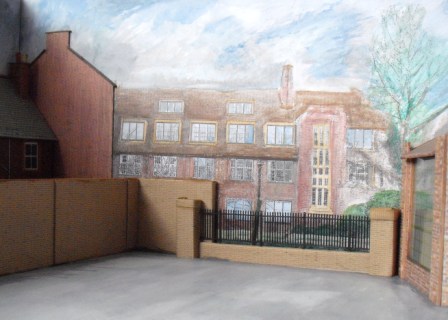
On the left above is
part of this Backscene with the office and end of building whilst the
photo above right shows the backscene
added behind the model buildings on the diorama. A similar approach will
be taken with the two sides, using photos of the street.
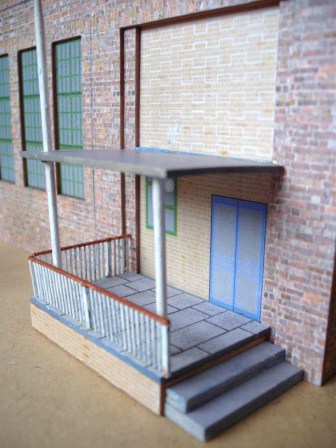
DETAILING
 Attention
to detail is one of the areas that can really make a diorama come to
life. I have witnessed some very good model railways that have would
have been spectacular if a little more additional details were added.
This involves such items as adding the guttering and downpipes to card
buildings, the drains to roads, etc. Some other details will help fix a
diorama to an intended period. The John Howe kit of
Reigate
is intended for the London Transport period whereas I want this to
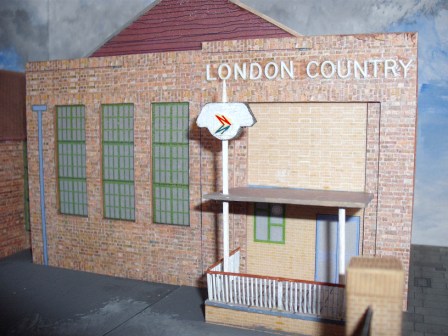
represent London Country in the 1970s. To achieve this, the white
"London Transport" lettering was painted out, blending the colours to
match the brickwork (see previously sent pic 260). White lettering to
as-near size was then added over the removed previous ownership, this
being white 6mm plastic letters produced by Slater`s Plastikard (ref.
1106). In common with many other London Country premises, the original
LCBS signage had their "flying polo" symbol until replaced by the
corporate NBC double N. This was created by scrap card pieces cut
to shape and then painted white. The NBC double N symbol is Mabex
waterslide transfer, secured in place with decalfix. The picture on the
right illustrates the office frontage.
Attention
to detail is one of the areas that can really make a diorama come to
life. I have witnessed some very good model railways that have would
have been spectacular if a little more additional details were added.
This involves such items as adding the guttering and downpipes to card
buildings, the drains to roads, etc. Some other details will help fix a
diorama to an intended period. The John Howe kit of
Reigate
is intended for the London Transport period whereas I want this to
represent London Country in the 1970s. To achieve this, the white
"London Transport" lettering was painted out, blending the colours to
match the brickwork (see previously sent pic 260). White lettering to
as-near size was then added over the removed previous ownership, this
being white 6mm plastic letters produced by Slater`s Plastikard (ref.
1106). In common with many other London Country premises, the original
LCBS signage had their "flying polo" symbol until replaced by the
corporate NBC double N. This was created by scrap card pieces cut
to shape and then painted white. The NBC double N symbol is Mabex
waterslide transfer, secured in place with decalfix. The picture on the
right illustrates the office frontage.
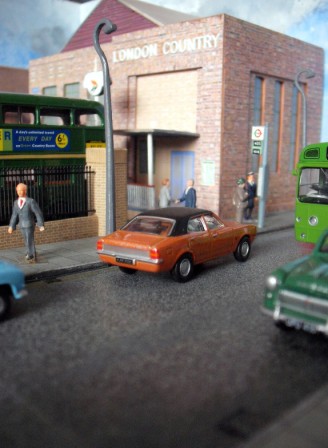
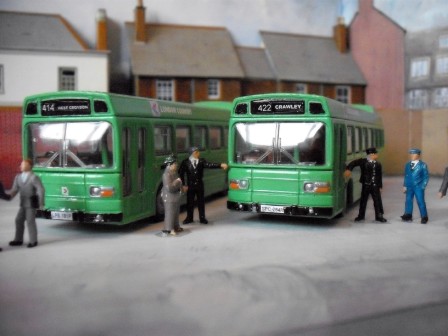
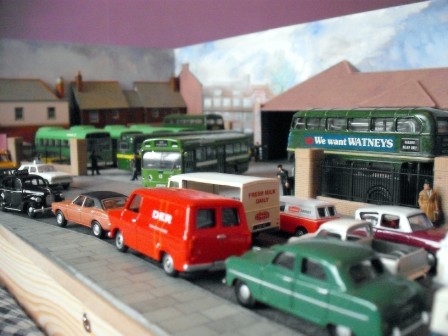
Bringing the scene to life, people, vehicles, lamposts, a bus
stop, and drains. There are several manufacturers offering 1:76
(Bachmann, Hornby) or 1:87 scale (Preiser, Noch) figures, the latter
comprehensive continental-manufactured ranges which can be mixed and
matched. (picture above left). Little cameo scenes can be created all
adding interest, the picture below left, perhaps, illustrating the start
of the morning shift whilst the picture below right shows parking
problems and congestion, Cararama, Pocketbond, Oxford, and Base Toys
cars and vans being used.
One thing to be careful of is the positioning of the taller items
such as lamp posts. Ideally these should not be placed too close to the
front edge in case these get knocked off if you intend on changing the
vehicles displayed.
Siggy de Reuther
![]()